![cc5404e7b75e6d484a23b7d9f19a2774.png]](https://support.arworkflow.com/hs-fs/hubfs/cc5404e7b75e6d484a23b7d9f19a2774.png?height=50&name=cc5404e7b75e6d484a23b7d9f19a2774.png)
Assigning an AI Workflow
There are multiple places where you can assign an AI Workflow.
From the Customers Page
-
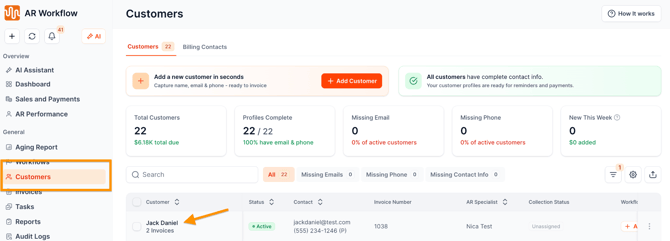
1. Go to Customers
-
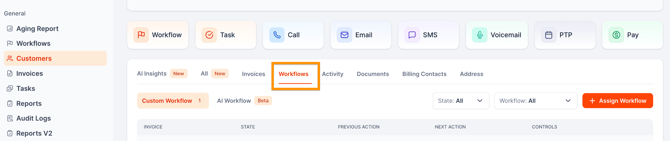
Select a customer to open a Customer Detail Page and go to Workflows Tab
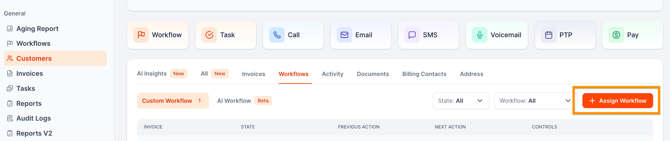
- Click +Assign Workflow to assign an AI Workflow
- Choose AI Workflow.
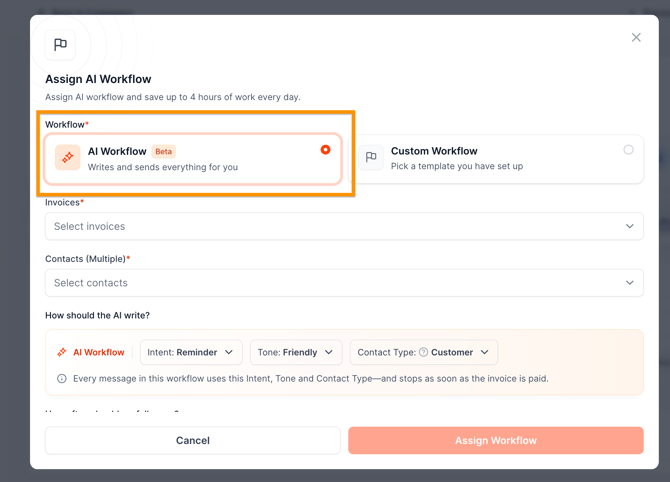
- Select the invoice and contact you want to assign the workflow to.
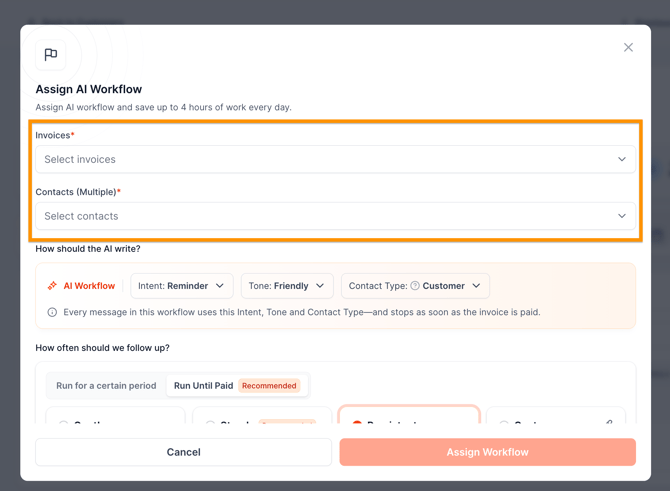
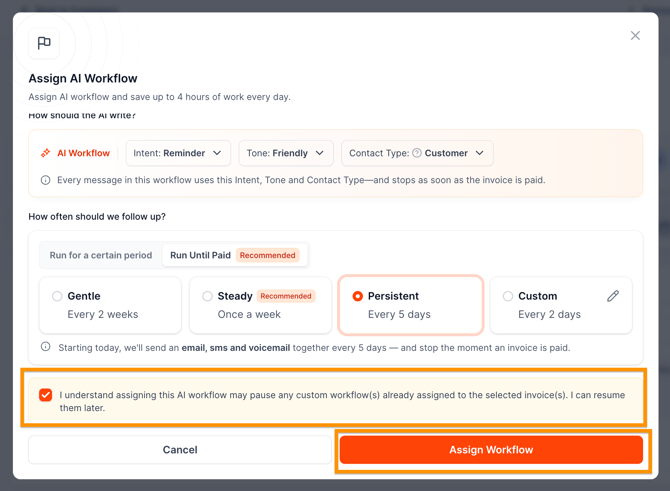
- Configure the AI Workflow settings with your preferred writing style and frequency.
- Acknowledge that AI Workflow may pause existing Custom Workflows that were already assigned previously
- Click Assign Workflow to save.
From the Invoice Page
- Go to the Invoice page.
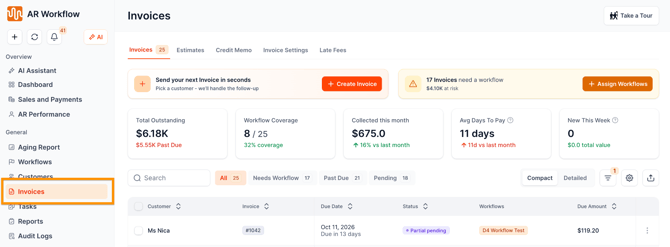
- Choose an invoice and click the ellipsis on the most right and click Assign Workflow
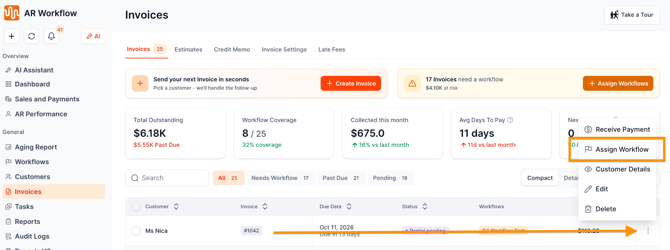
- Choose AI Workflow.
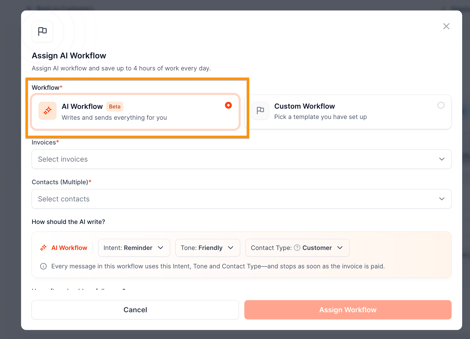
- Select the invoice and contact you want to assign the workflow to.
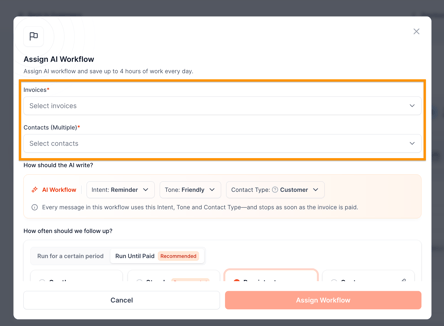
- Configure the AI Workflow settings with your preferred writing style and frequency.
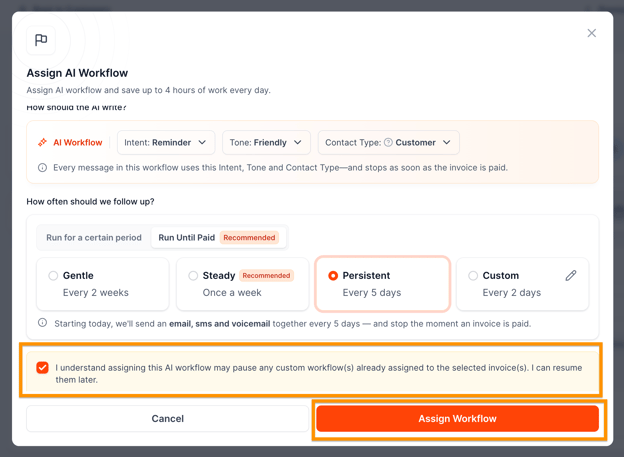
- Acknowledge that AI Workflow may pause existing Custom Workflows that were already assigned previously
- Click Assign Workflow to save.
From the Workflows Page
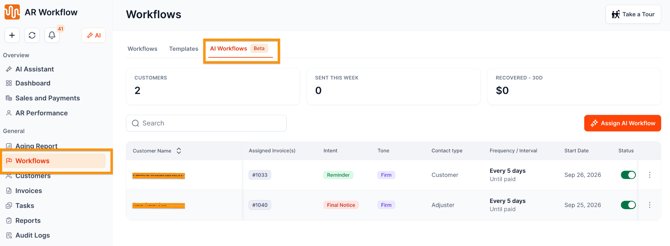
- Go to the Workflows page.
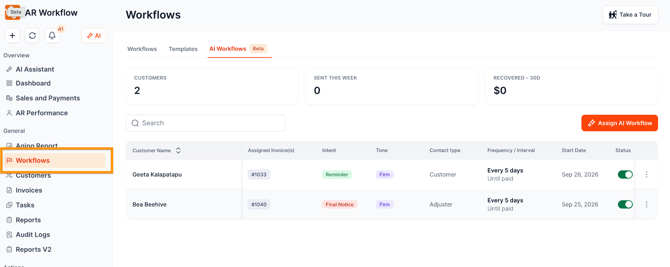
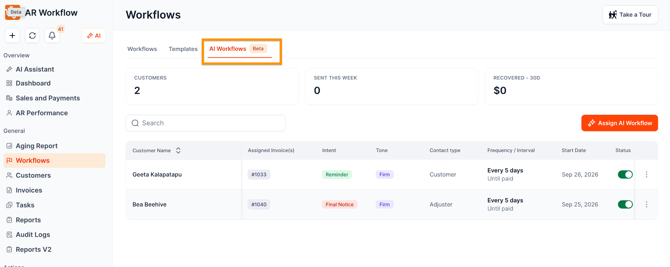
- Select the AI Workflows tab.
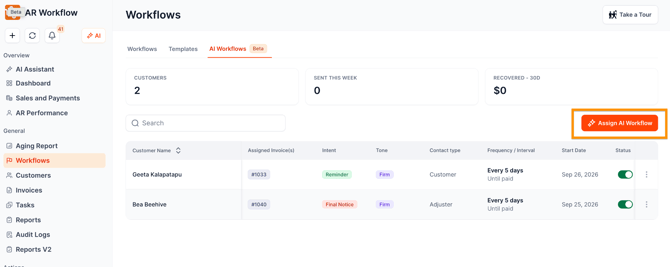
- Select Assign AI Workflow.
- Select one more more customer that you want to assign an AI Workflow with
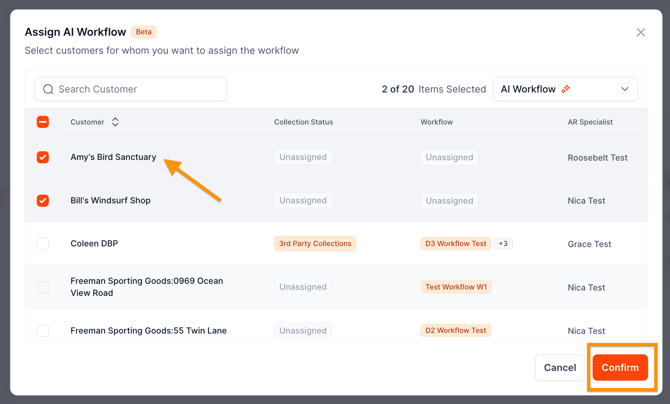
- Choose which contact you’d like to assign and configure the workflow settings such as the writing preference and frequency.
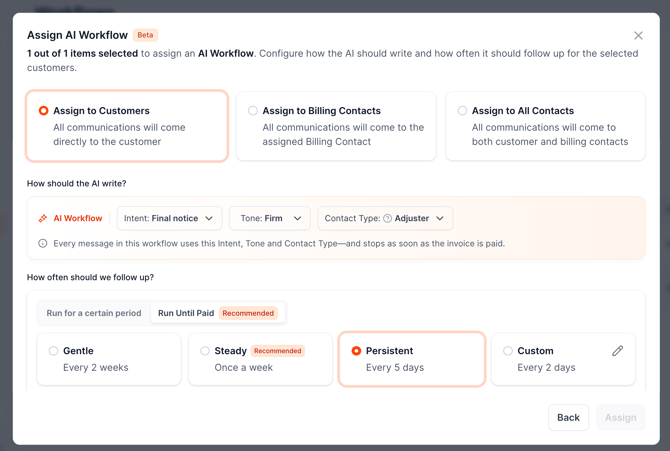
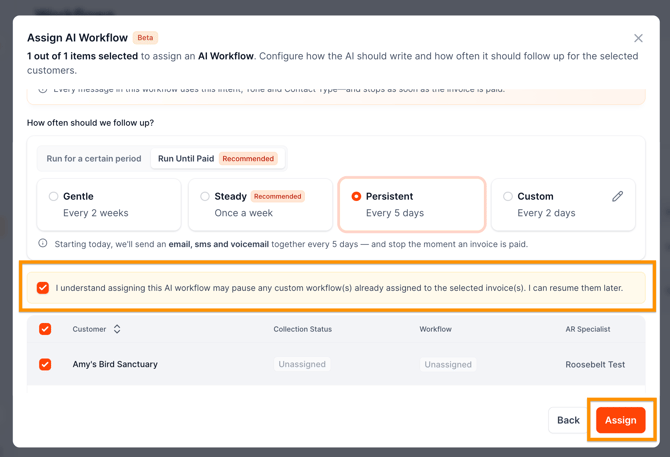
- Acknowledge that AI Workflow may pause existing Custom Workflows that were already assigned previously
- Click Assign
AI Workflows are also available from other workflow-assignment areas throughout the platform, including:
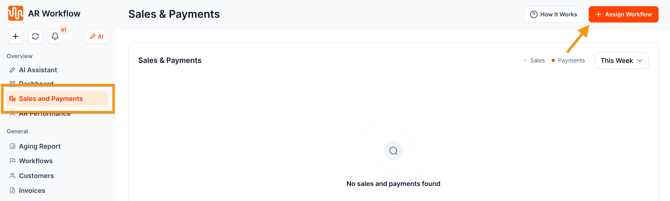
Sales and Payments
- Go to Sales and Payments Tab
- Click +Assign Workflows located on the top right corner
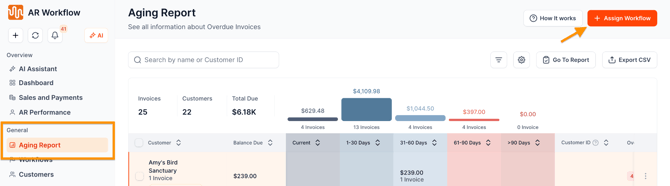
Aging Report
- Go to Sales and Payments Tab
- Click +Assign Workflows located on the top right corner
Selecting Invoices and Billing Contacts
You can assign an AI Workflow to a specific invoice and billing contact.
Selecting Invoices
- Go to Customers.
- Select a customer to open a Customer Detail Page and go to Workflows Tab
- Click +Assign Workflow to assign an AI Workflow
- Make sure to choose AI Workflow in the Workflow section
- Go to the Invoices section and click the dropdown menu to choose an invoice you want to associate the AI Workflow with
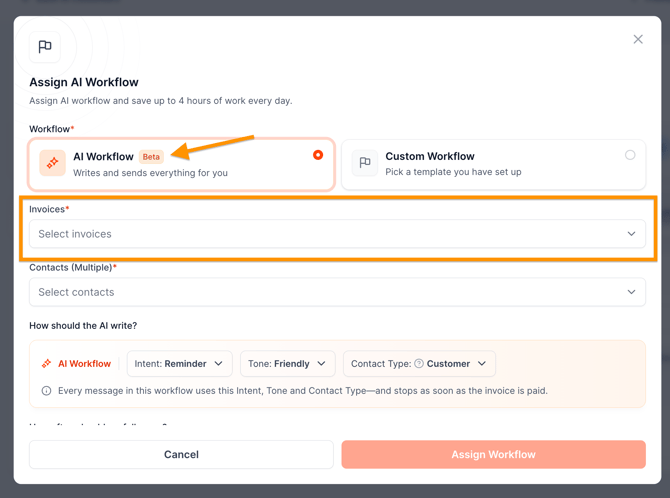
Once assigned, the AI Workflow will use the configured settings to generate and manage personalized Email, SMS, and Voicemail outreach.
Selecting Contacts
- Go to Customers.
- Select a customer to open a Customer Detail Page and go to Workflows Tab
- Click +Assign Workflow to assign a Workflow
- Make sure to choose AI Workflow in the Workflow section
- Go to the Contacts section and click the dropdown menu to choose a contact for the workflow
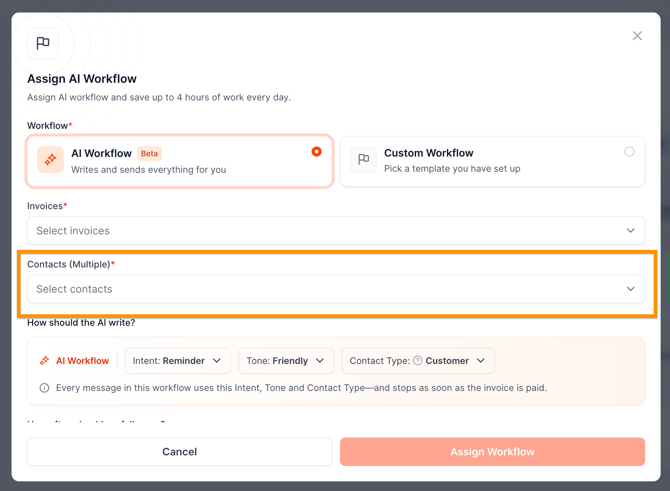
Once assigned, the AI Workflow will use the contact information to send the Email, SMS, and Voicemail outreach.
Choosing Intent
Choosing the intent of the workflow helps AI determine the purpose of the communication and generate appropriate content for the customer.
For example, the intent may relate to a payment reminder, a promise-to-pay follow-up, or another type of collection communication.
To choose the intent:
- Go to Customers.
- Select a customer to open a Customer Detail Page and go to Workflows.
- Select + Add Workflow.
- Choose the Invoice and Contact.
- Under How should AI write, select the Intent for the workflow.
- You can also select the Tone and Contact Type.
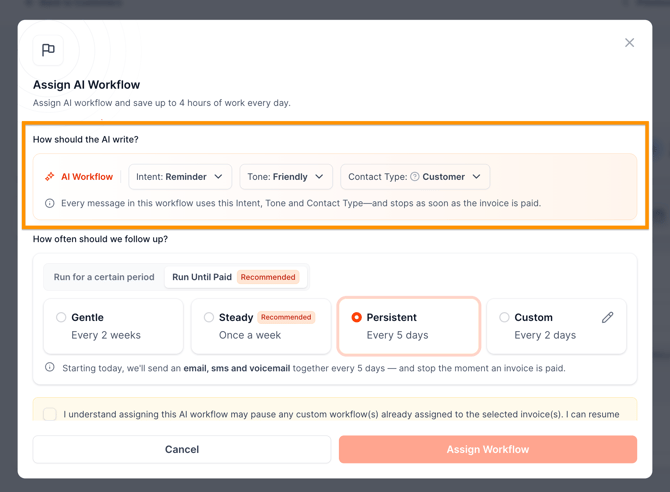
The selected intent, tone, and contact type help determine how the AI-generated Email, SMS, and Voicemail messages are written.
AI Workflow Settings
Set Up the Basics
Setting up your AI Workflow through the AI Assistant Tab controls how AI Workflows operate across the platform.
You can use this page to turn AI Workflows on or off. When AI Workflows are turned off globally, AI Workflows that have already been assigned to customers will also be turned off automatically.
To access this settings:
- Go to AI Assistant under Overview.
- Select AI Workflow.
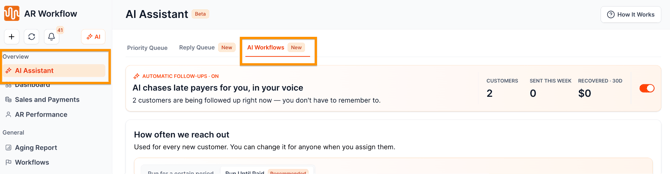
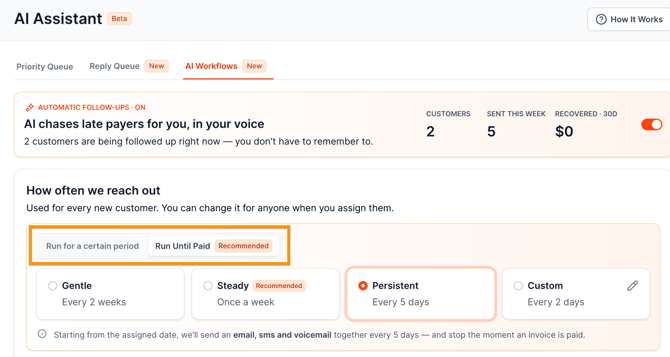
Under this same page, you can configure how often AI Workflows reach out to customers. You can choose to:
- Run for a certain period
- Run until paid
You can also customize the duration using days, weeks, months, or years.
Sending Preferences
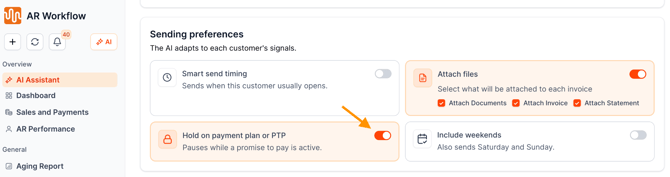
You can also configure how AI Workflows behave for individual customer situations. You can choose whether to:
- Include or exclude response/sending-time considerations.
- Include or exclude attached files.
- Include or exclude payment plan or PTP considerations.
- Include or exclude weekends.
Test and Preview
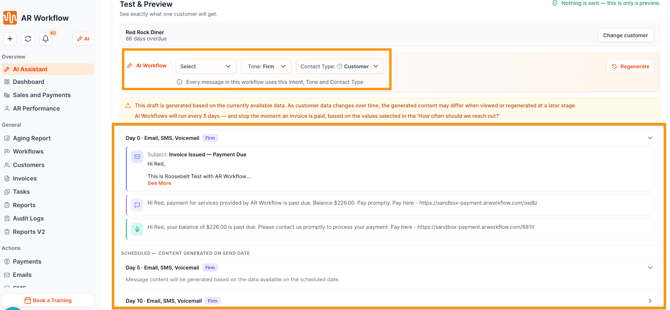
The Test and Preview section allows you to select a customer and preview the AI-generated messages based on your current settings.
You can review the:
- Email
- SMS
- Voicemail
You can also change the Intent, Tone, and Contact Type, then regenerate the messages to preview how the content changes.
The preview is available for Day 0. Messages for subsequent days are generated based on their scheduled dates.
AI Workflow Metrics
This page also provide an overview of AI Workflow activity, including:
- The total number of customers assigned to AI Workflows.
- The total number of actions performed using AI Workflows during the week.
- The total amount collected using AI Workflows over the last 30 days.
Hover over the metrics to view additional details.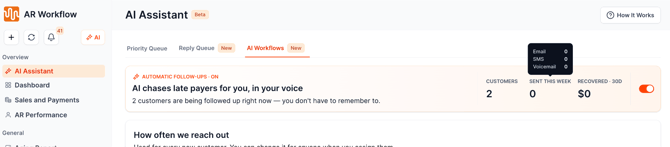
Set Up your Preferences
You can customize an AI Workflow after it has been assigned to a customer.
At the customer level, you can modify settings for an individual AI Workflow without changing the global configuration for all AI Workflows.
You can also:
- Edit an assigned AI Workflow.
- Pause an AI Workflow.
- Delete an AI Workflow.
- View the next scheduled outreach.
To access all assigned AI Workflows:
- Go to Workflows
- Select the AI Workflows tab.
- Select the AI Workflow you want to manage.