![cc5404e7b75e6d484a23b7d9f19a2774.png]](https://support.arworkflow.com/hs-fs/hubfs/cc5404e7b75e6d484a23b7d9f19a2774.png?height=50&name=cc5404e7b75e6d484a23b7d9f19a2774.png)
How to Identify AI Workflows
AI Workflows are differentiated from Custom Workflows throughout the workflow interface, making it easier to identify which type of workflow is assigned.
You can identify AI Workflows assigned to customers and invoices from several areas of the application.
Customer Main Page
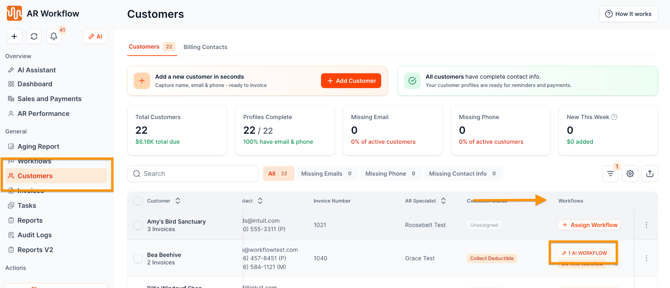
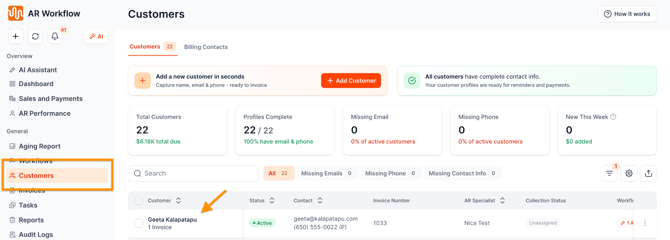
- Click Customers Tab on the left-hand sidebar.
- Scroll horizontally to reveal additional columns.
- Locate the Workflows column.
- Look for the AI Workflow label to identify customers with an AI Workflow assigned.
Customer Detail Page
- Go to Customers Tab.
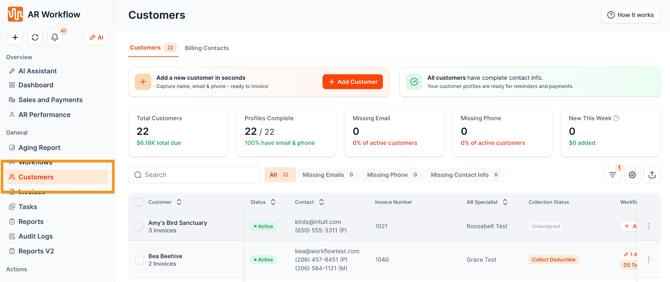
- Select a customer to open the Customer Detail page.
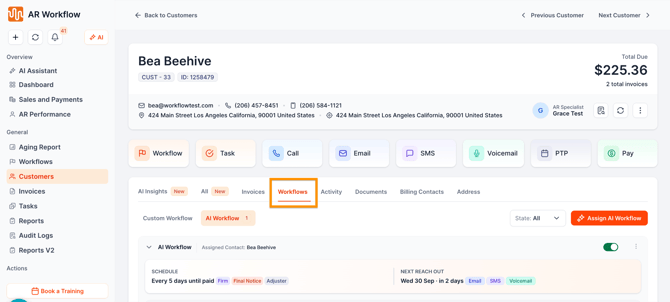
- Go to the Workflows and select AI Workflows to view the AI Workflows assigned to the customer.
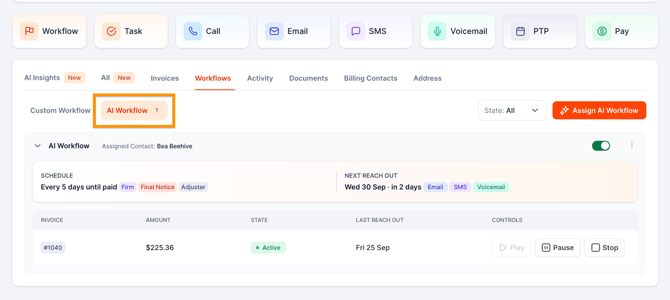
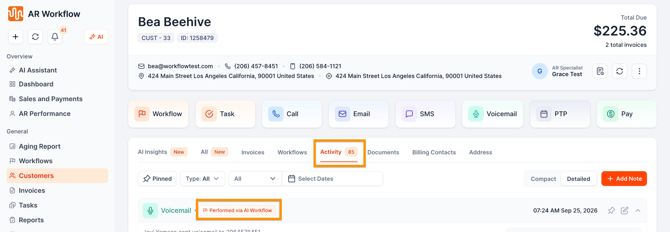
- Under Activity, you can also identify outreach performed by an AI Workflow. Look for the Performed via AI Workflow label on Email, SMS, or Voicemail activities.
Invoices Page
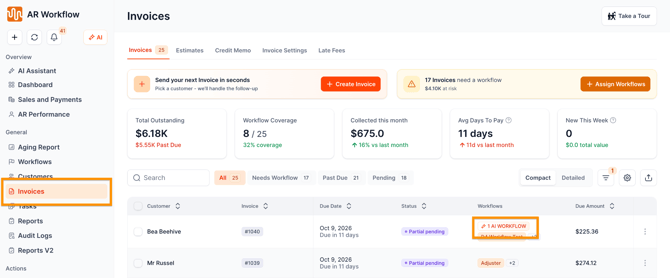
- Click Invoices Tab on the left-hand navigation.
- Locate the Workflows column and look for the AI Workflow label on invoices with an assigned AI Workflow.
Viewing the Next and Previous Reach-Outs
You can view the next scheduled reach-out and the history of previous actions performed by an AI Workflow from the customer's workflow area.
View the Next Reach-Out
- Go to Customers Tab and select a customer to open the Customer Detail page.
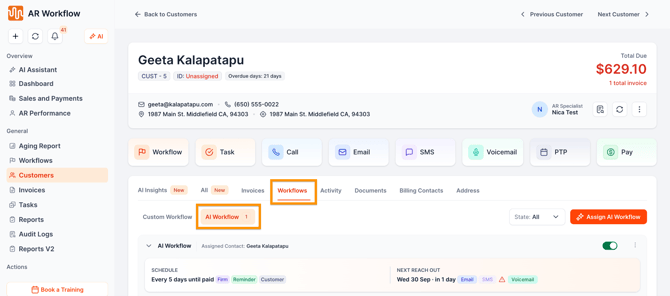
- Go to the Workflows and select AI Workflows.
-
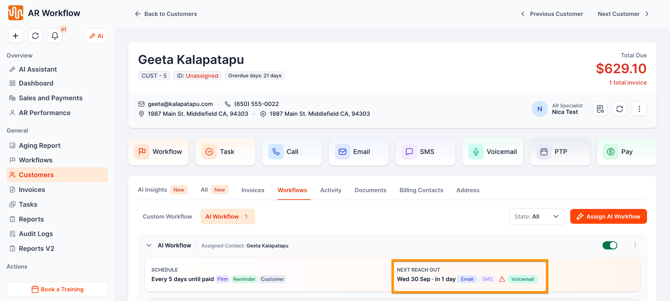
Locate the AI Workflow you want to review and view the Next Reach Out information in the AI Workflow details.
View the Previous Reach-Out
-
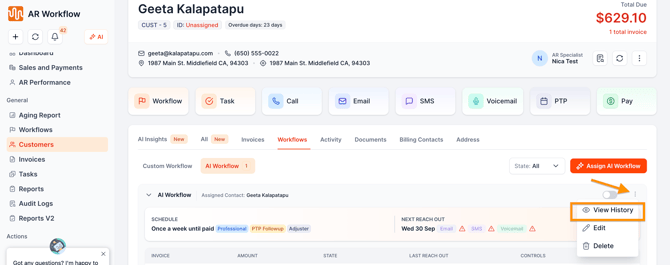
From the same AI Workflow page, click the ellipsis (...) next to the AI Workflow.
-
Select View History.
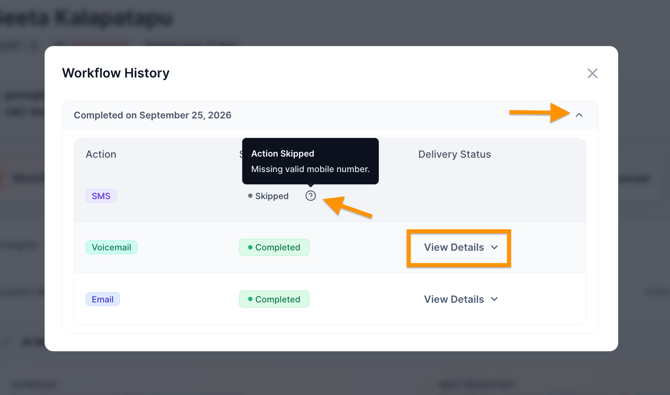
- Click the dropdown or View Details to see detailed information about the actions taken.
- Hover over the question mark (?) icon to view any available error messages.
Managing AI Workflows
Once an AI Workflow has been assigned, you can manage it from the workflow area.
Depending on the workflow's current state, you can:
- Edit the workflow.
- Pause the workflow.
- Stop the workflow.
- Delete the workflow.
Editing an AI Workflow
You can edit AI Workflows from the Workflows page or from an individual customer's Customer Detail page.
Edit an AI Workflow from the Workflows Page
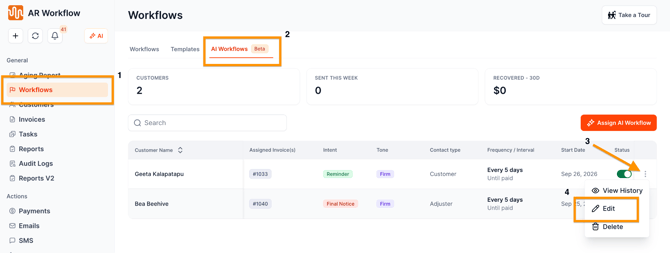
If you’re editing multiple AI Workflows, it is recommended that you make changes directly in the Workflows page. To do so, follow these steps:
- Go to Workflows.
- Select AI Workflows
- Locate the AI Workflow you want to edit. And lick the ellipsis (...) on the right.
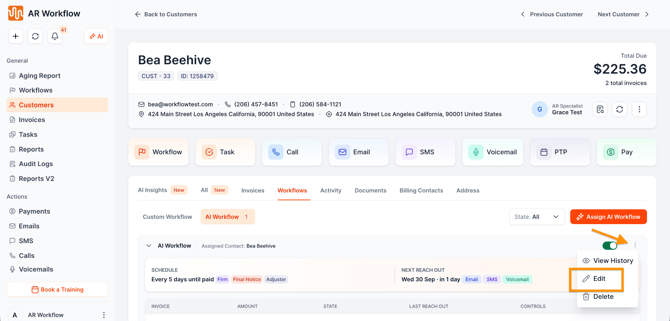
- Select Edit.
- Make your changes and save them.
Edit an AI Workflow for a Specific Customer
If you’re looking to edit an AI Workflow for a specific customer, you can follow the steps below instead:
- Go to Customers Tab.
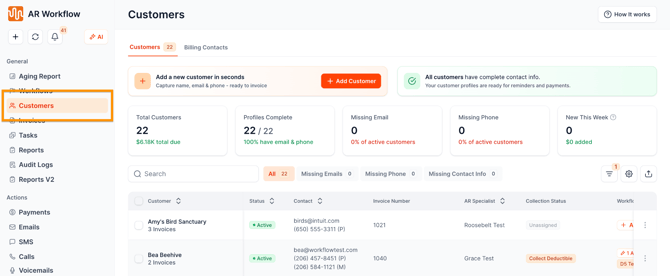
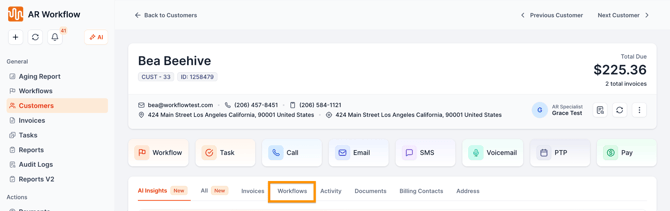
- Select a customer to open the Customer Detail page and go to Workflows.
- Select AI Workflows and locate the AI Workflow you want to edit.
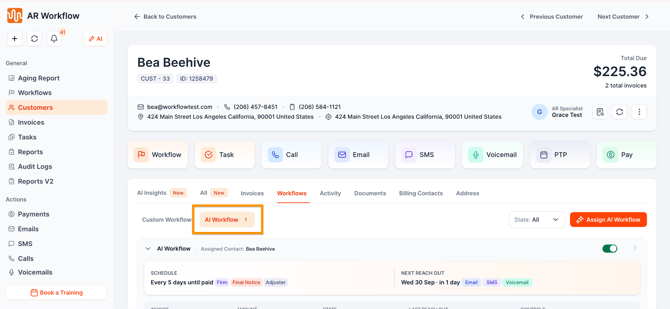
- Click the ellipsis (...) on the right and then Edit to make your changes and save them.
Pause or Stop an AI Workflow
To Pause an AI Workflow, you would need to go to do so on a Customer Level
- Go to Customers Tab.
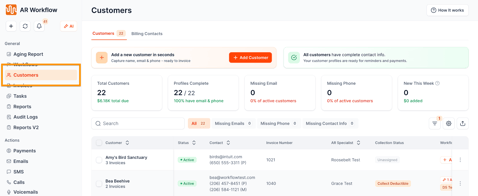
- Select a customer to open the Customer Detail page, then go to Workflows.
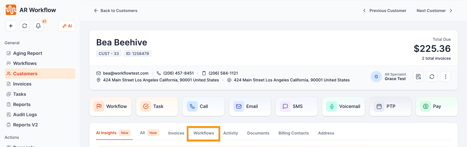
- Select AI Workflows, and the AI Workflow you want to manage.
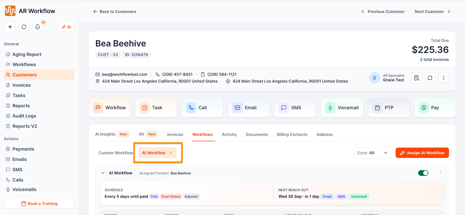
- Scroll to the Controls section and click Pause to temporarily pause the workflow.
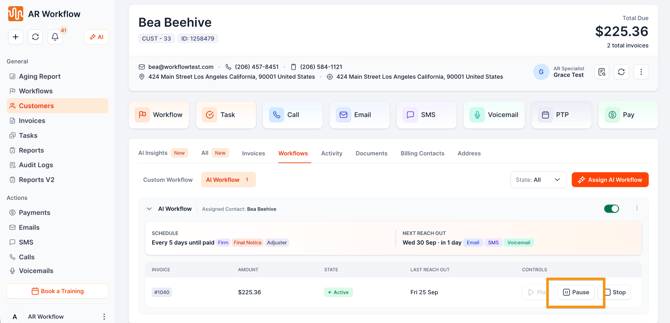
- And click Stop to stop the workflow.
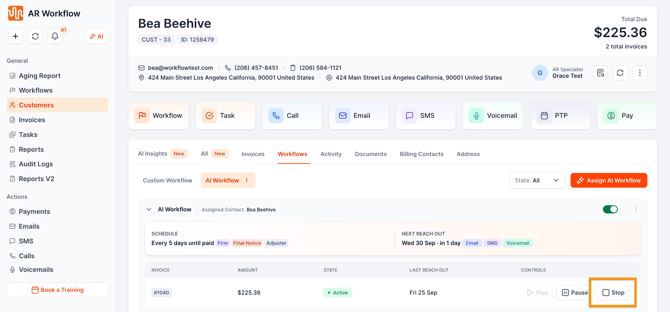
Note: Pausing and stopping an AI Workflow are different actions. Use Pause when you want to temporarily suspend the workflow and Stop when you want to stop the workflow.
Deleting an AI Workflow
You can delete an AI Workflow from the Workflows or Customers Tab.
Delete from the Workflows Page
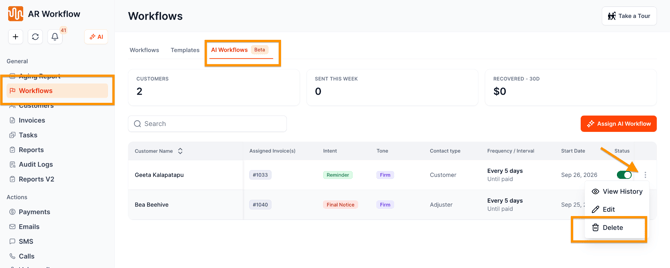
- Go to Workflows Tab.
- Select AI Workflows.
- Locate the AI Workflow you want to delete.
- Click the ellipsis (...).
- Select Delete.
Delete from a Customer's Workflows
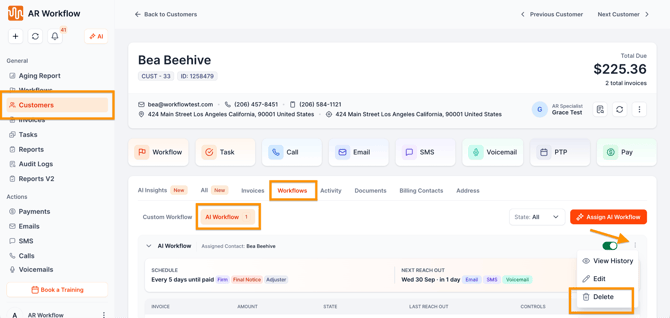
- Go to Customers.
- Select a customer to open the Customer Detail page.
- Go to Workflows.
- Select AI Workflows.
- Click the ellipsis (...) beside the AI Workflow you want to delete.
- Select Delete.
AI Workflow Dashboard Metrics
The AI Workflow dashboard provides an overview of your AI Workflow activity and results.
The metrics include:
- Customers — the total number of customers with assigned AI Workflows.
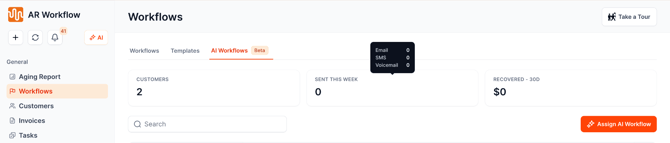
- Sent This Week — the total number of actions performed using AI Workflows during the current week.
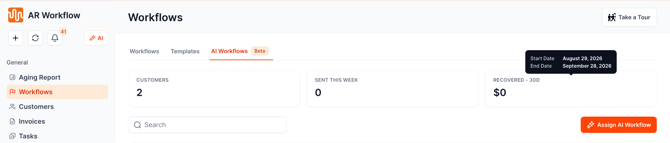
- Collected - 30 Days — the total amount collected through AI Workflows during the displayed 30-day period.
View AI Workflow Metrics
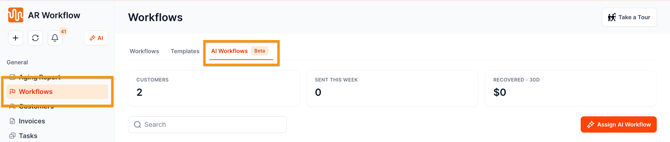
- Go to Workflows Tba.
- Select AI Workflows
- Review the metrics displayed at the top of the page
- To see a breakdown of the actions included in Sent This Week, hover over the metric to view the number of Email, SMS, and Voicemail actions.
- To view the start and end dates covered by the Collected - 30 Days metric, hover over the metric.
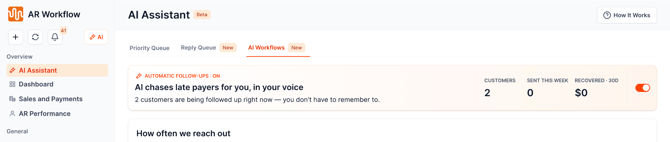
You can also view these metrics from the AI Workflow settings page.
- Go to AI Assistant Tab.
- Select AI Workflows.
- Review the metrics displayed at the top of the page.
Audit Log
The Audit Log records changes related to AI Workflow assignments.
To review AI Workflow audit events:
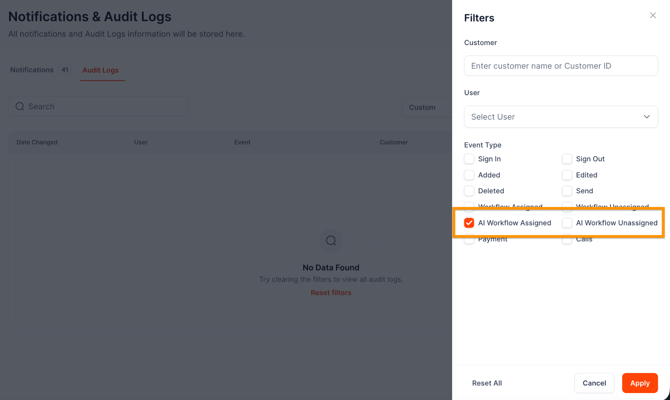
- Go to the Audit Log and open the Filters.
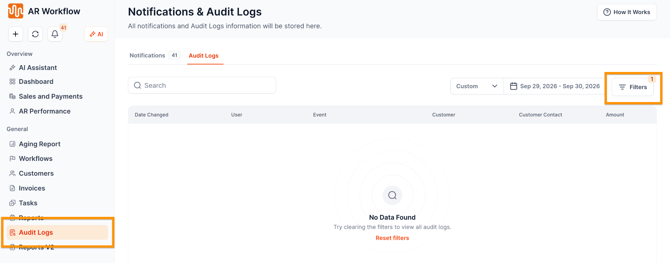
- Filter for AI Workflow events and hit Apply.
- Review the recorded changes.
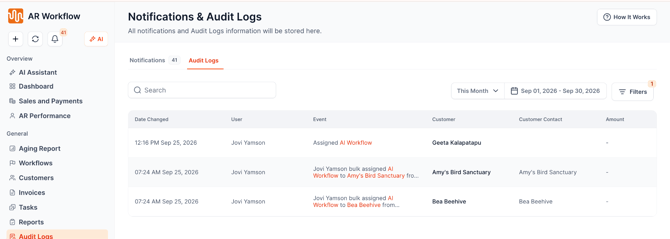
The Audit Log includes events such as:
- AI Workflow Assigned
- AI Workflow Unassigned
AI Workflow Changes
To view the changes made on your AI Workflow, please follow these steps:
- Go to Customers Tab
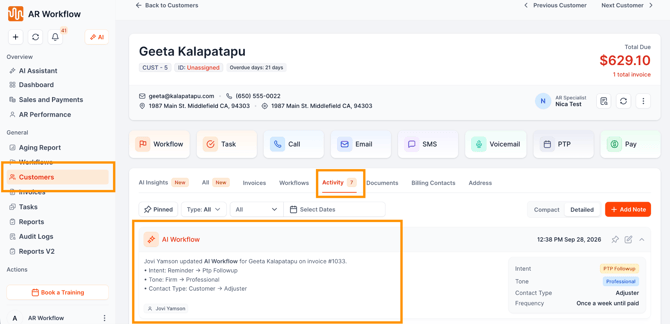
- Choose a customer to open a Customer Detail Page, and click on Activity
- You should see the changes made on the AI Workflow that was assigned to the customer, including changes in writing style, frequency, and contact.