![cc5404e7b75e6d484a23b7d9f19a2774.png]](https://support.arworkflow.com/hs-fs/hubfs/cc5404e7b75e6d484a23b7d9f19a2774.png?height=50&name=cc5404e7b75e6d484a23b7d9f19a2774.png)
How to Access and Share a Customer's Payment Link
The Customer Payment Link allows you to provide customers with a direct link to complete their payments. You can copy the link from the customer's details page, send it through email or SMS, or include it in your email and SMS templates using the available merge fields.
Note: Customer Payment Links are hosted by Finix, our payment service provider. This feature is available only for accounts with Finix activated.
Option 1: Copy a Customer's Payment Link
To copy a customer's payment link:
- Navigate to the Customers tab.
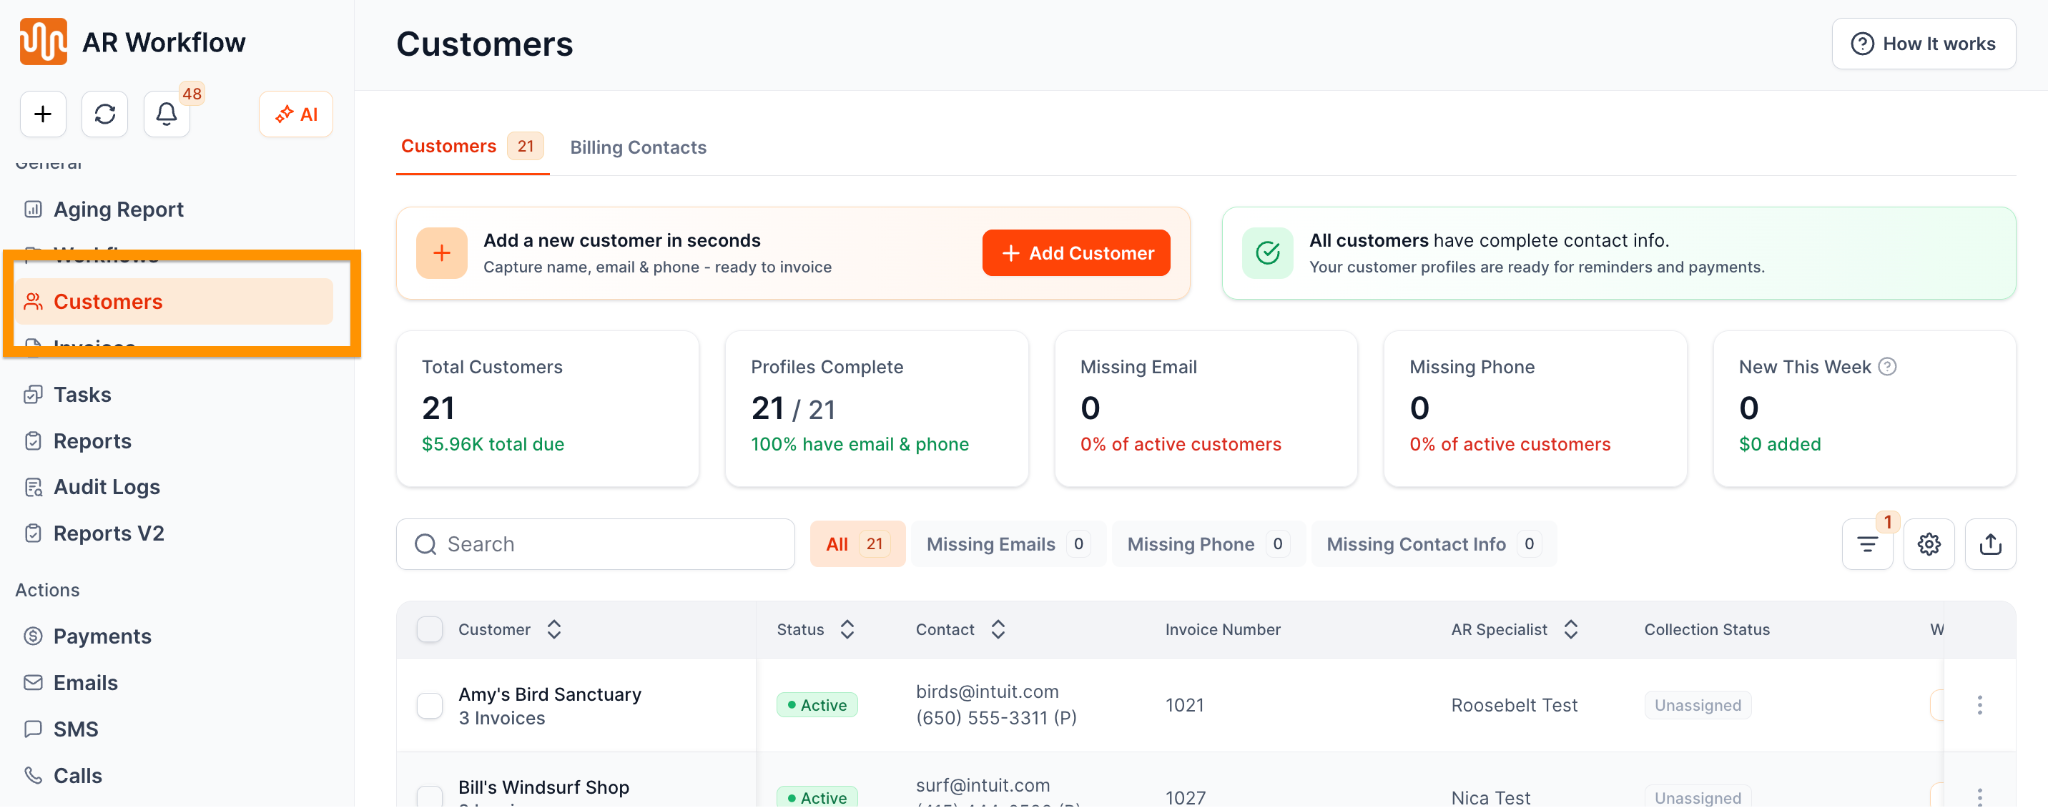
- Select a customer to open their Customer Detail Page.
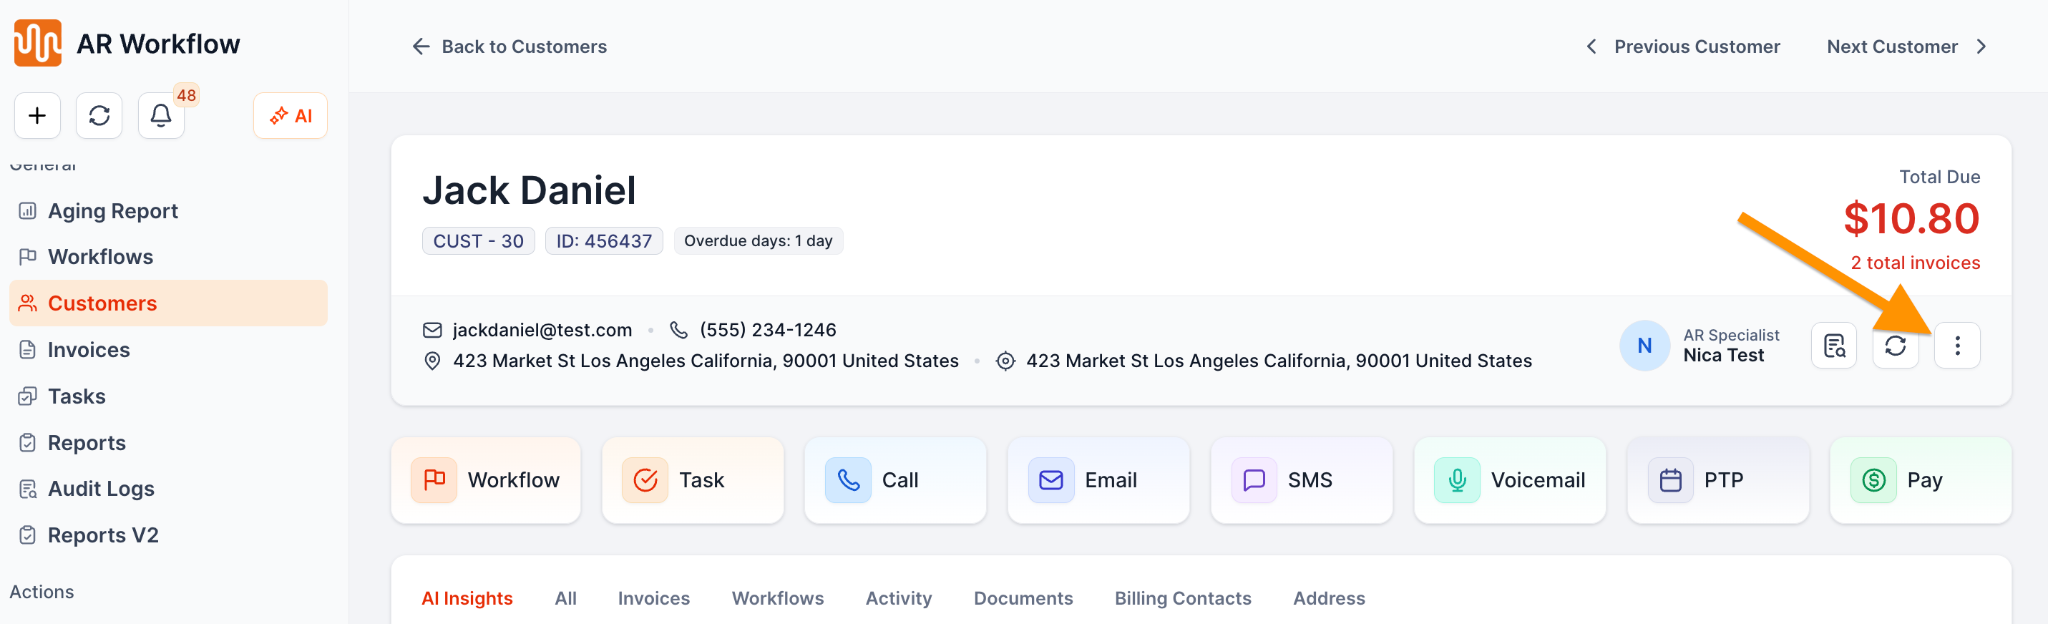
- Locate the customer's information section and click the ellipsis (three-dot) menu on the far right.
- Select Copy Payment Link.
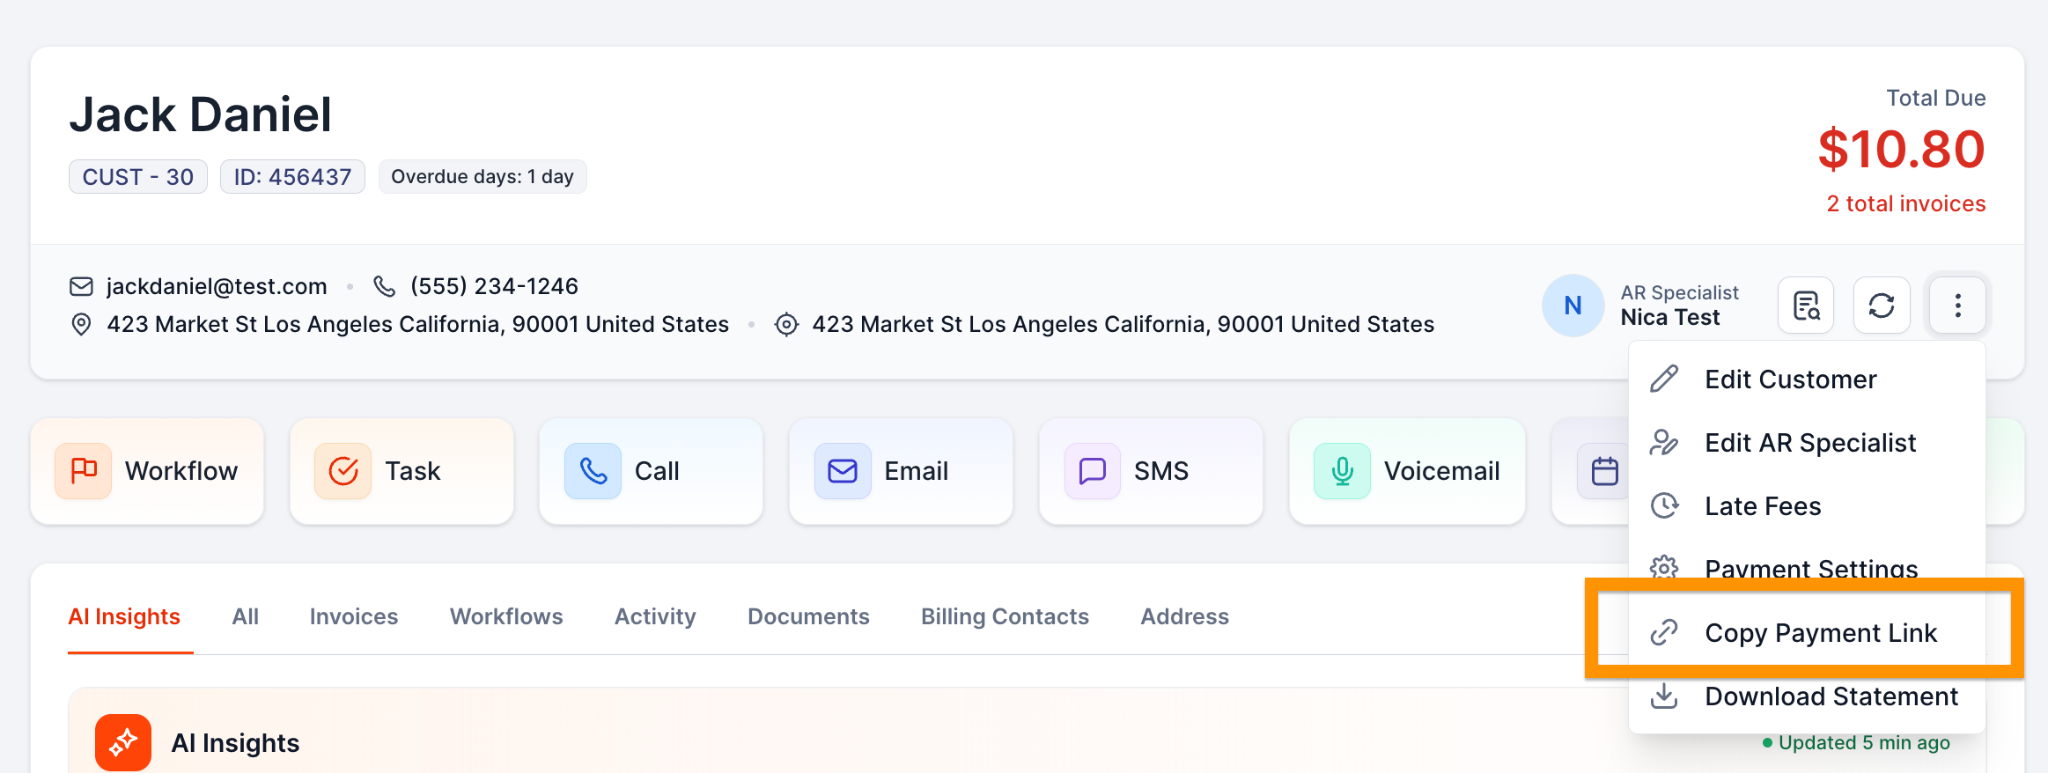
The payment link will be copied and can then be shared with the customer through your preferred communication channel.
Option 2: Send a Payment Link Through Email or SMS
You can also include a customer's payment link directly in an email or SMS message.
- Navigate to the Email or SMS tab.
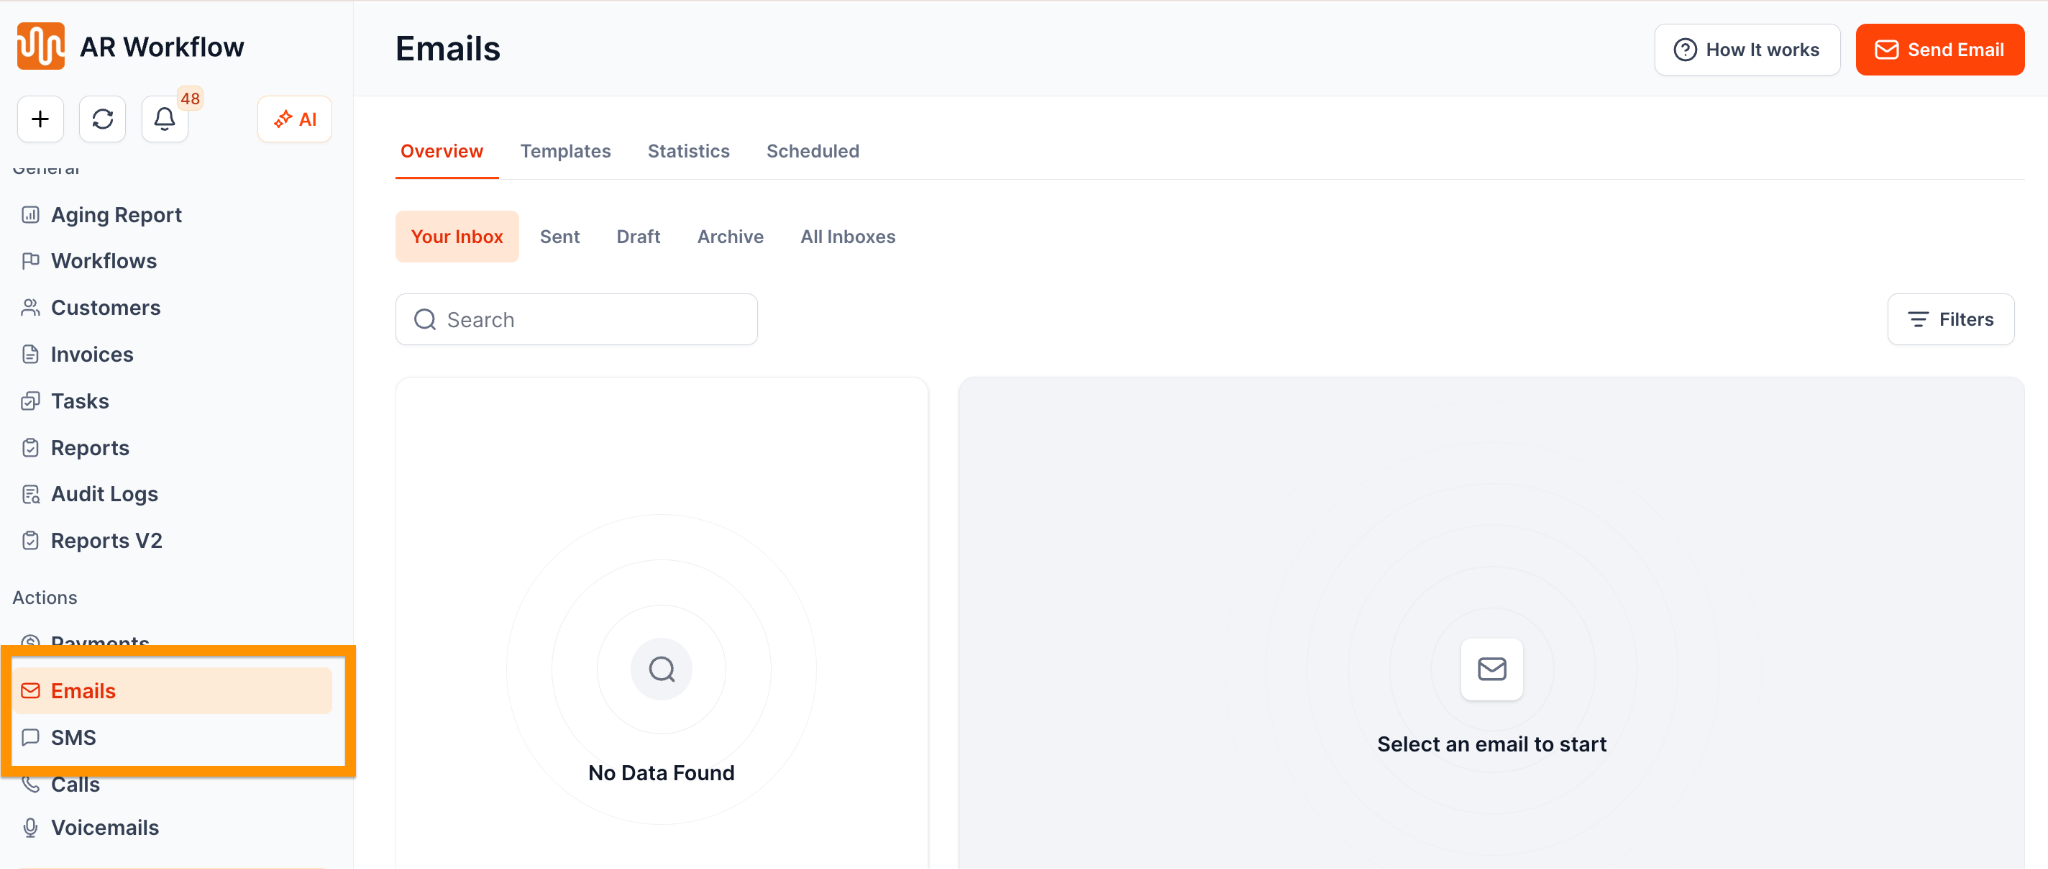
- Click Send Email or Send SMS, depending on your preferred communication channel.
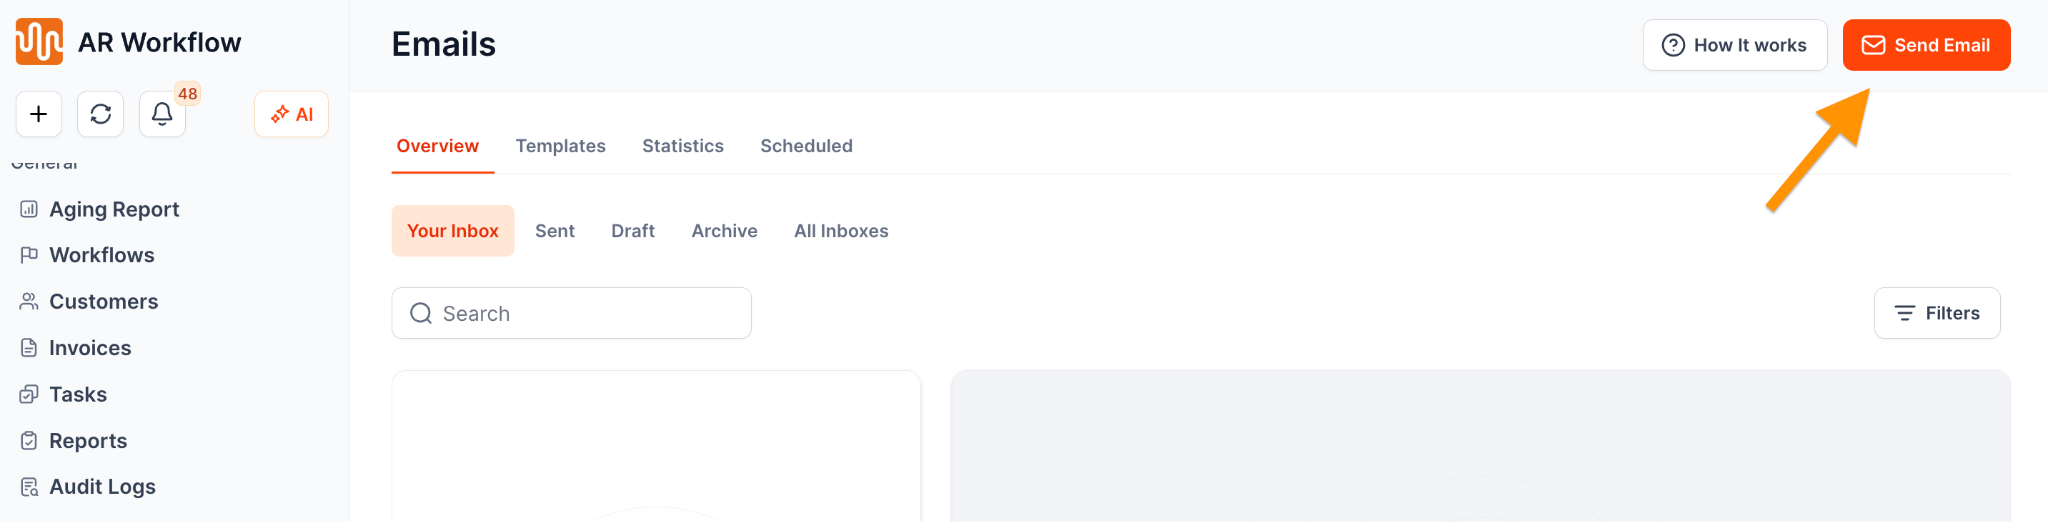
- In the message body section, click the Merge Fields dropdown.
- Select Customer Payment Link.
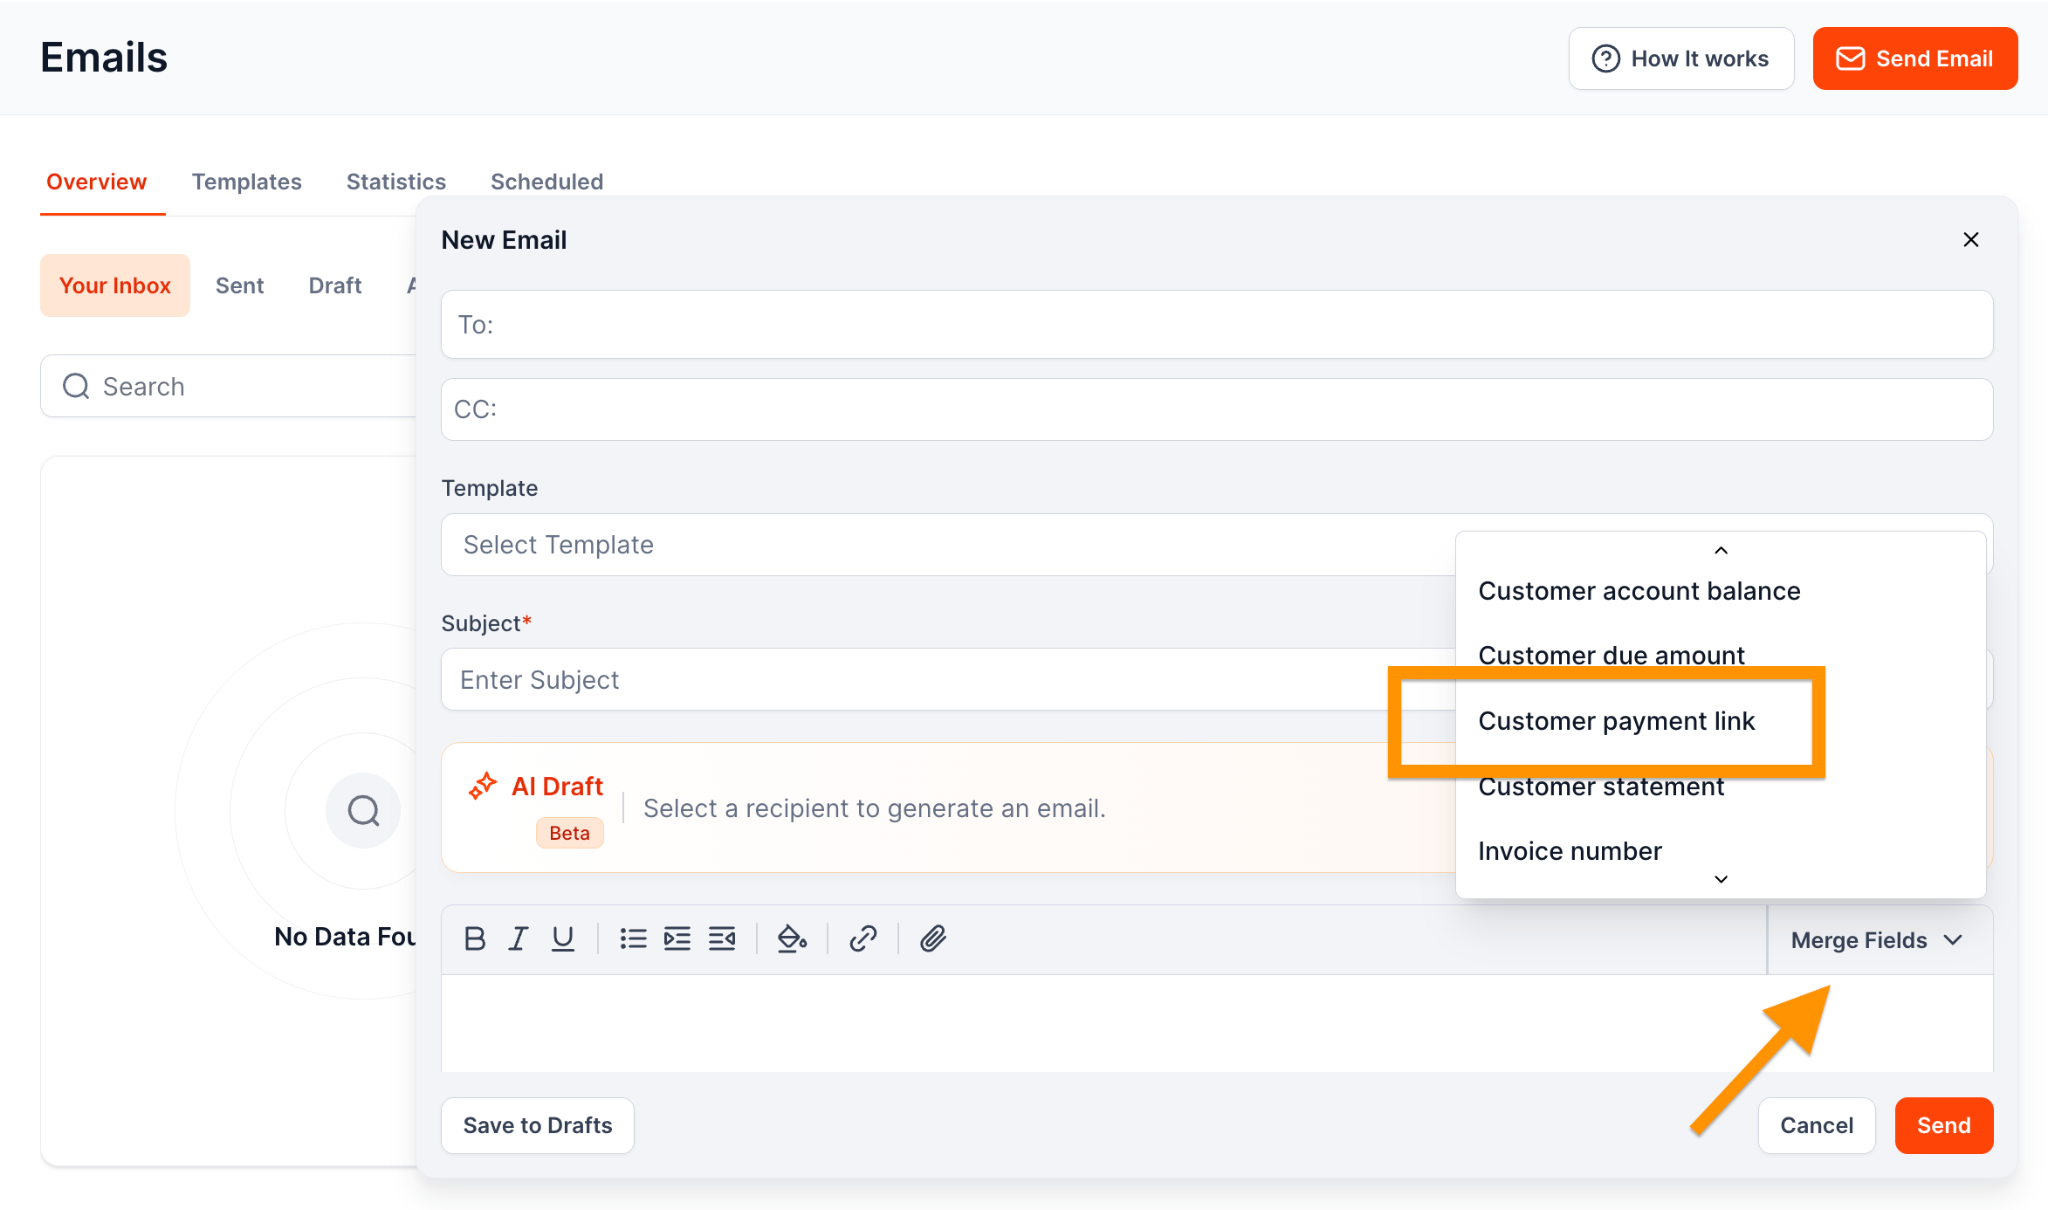
The selected merge field allows the customer's payment link to be included in the message, making it easier to direct them to the payment page.
Option 3: Add a Payment Link to Email or SMS Templates
To make payment links readily available in your reusable message templates, you can add the Customer Payment Link merge field to an email or SMS template.
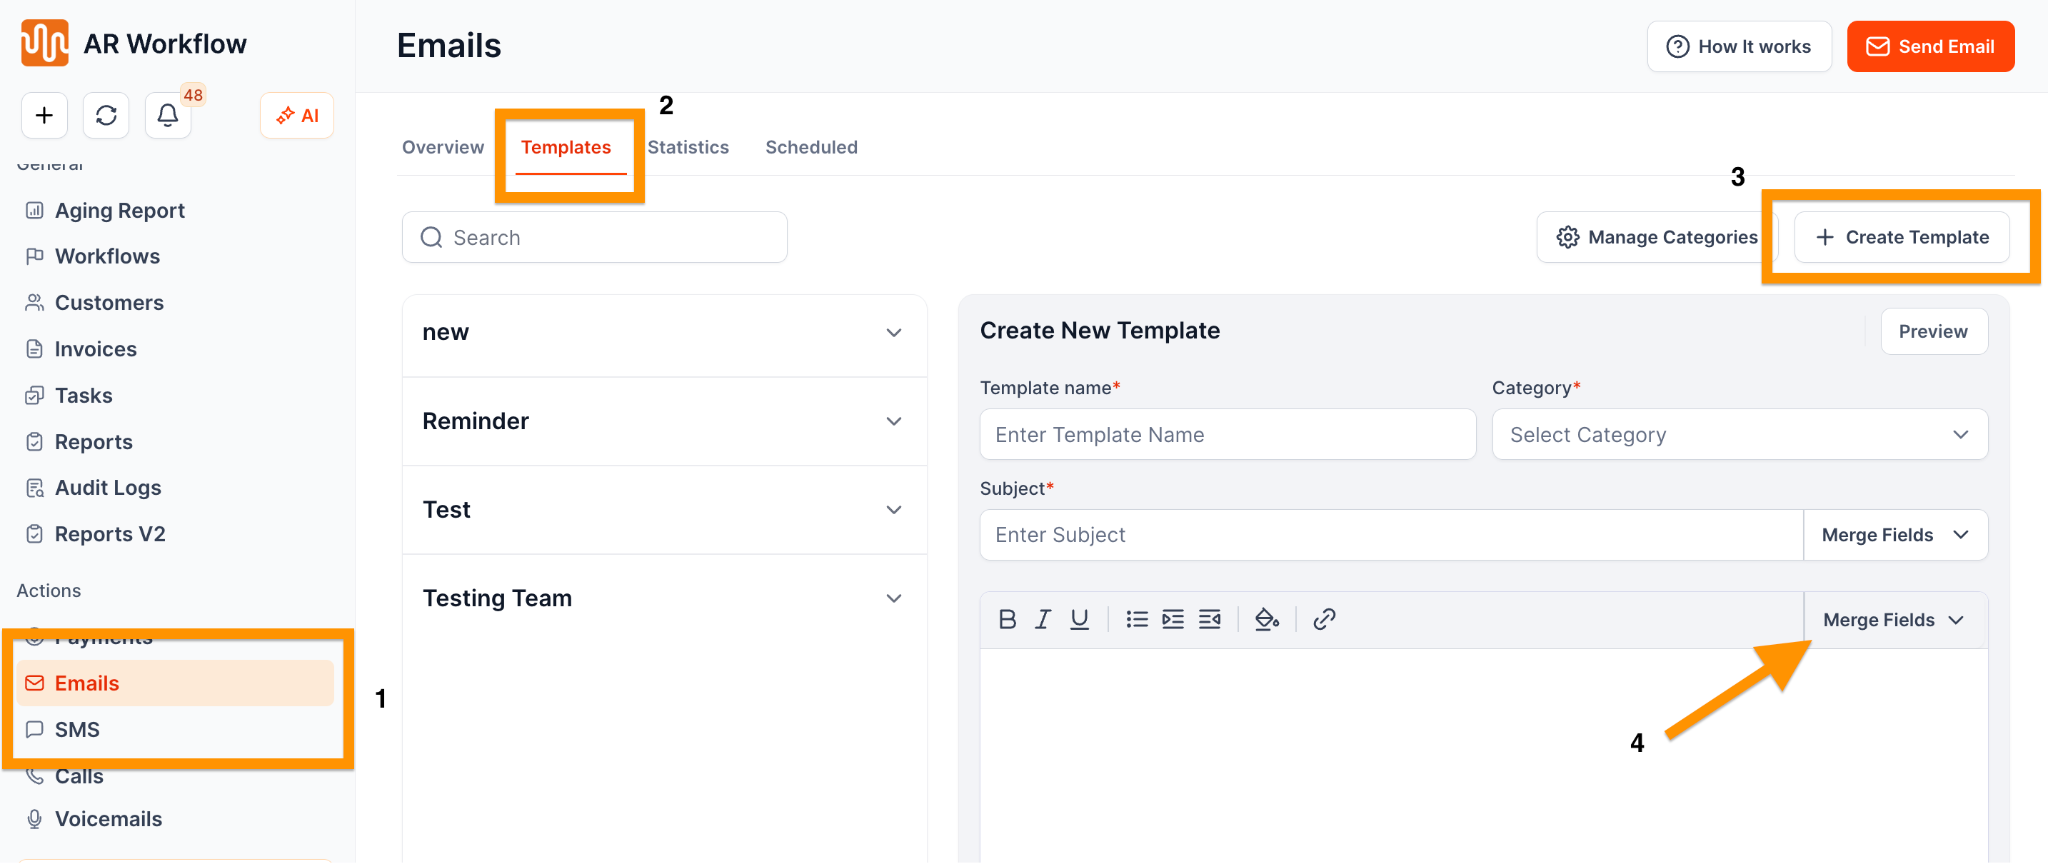
- Navigate to the Email or SMS tab
- Go to the Templates Tab and choose the template you wish to edit or click Create Template to configure a new one.
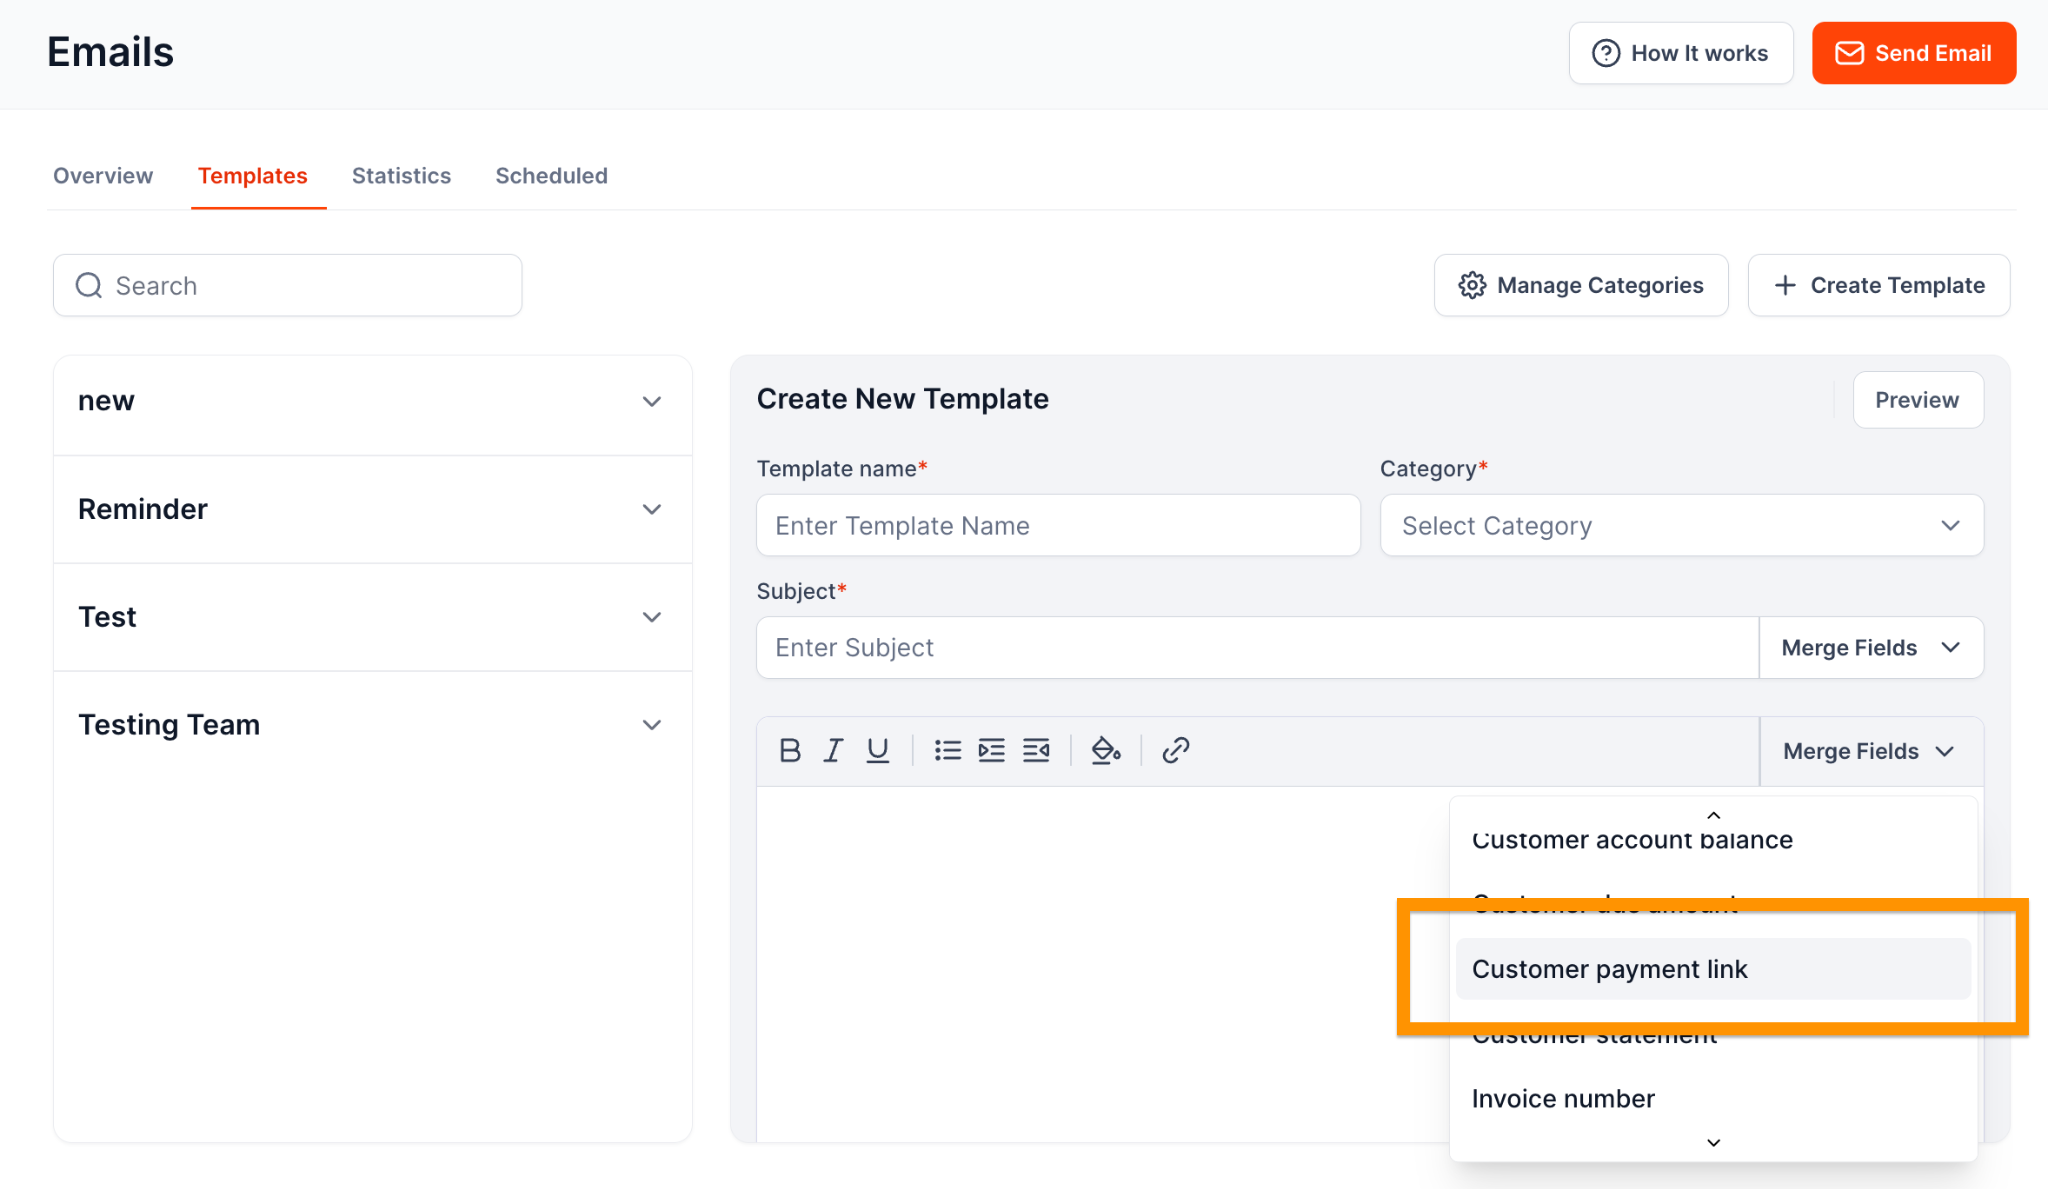
- In the message body section, open the Merge Fields dropdown.
- Select Customer Payment Link and position it where you want the payment link to appear in the message.
- Scroll down and click Save.
Once configured, the template can include the customer-specific payment link when used to communicate with customers.
2. Add Payment Links to Workflows
Adding Customer Payment Links to workflows allows merchants to send payment links to customers automatically through email or SMS actions. By including payment links in automated reminders, merchants can make it easier for customers to access their payment pages and complete outstanding payments.
This can help streamline collection efforts by making payment links more accessible and reducing the steps customers need to take to initiate a payment.
Before You Begin
Before adding a payment link to a workflow, make sure you have created an email or SMS template that includes the Customer Payment Link. Refer to Option 3: Add a Payment Link to Email or SMS Templates in Section 1 for instructions.
Steps to Add Payment Links to a Workflow
- Navigate to the Workflows tab.
- Search for an existing workflow you want to modify, or click Create Workflow to create a new one.
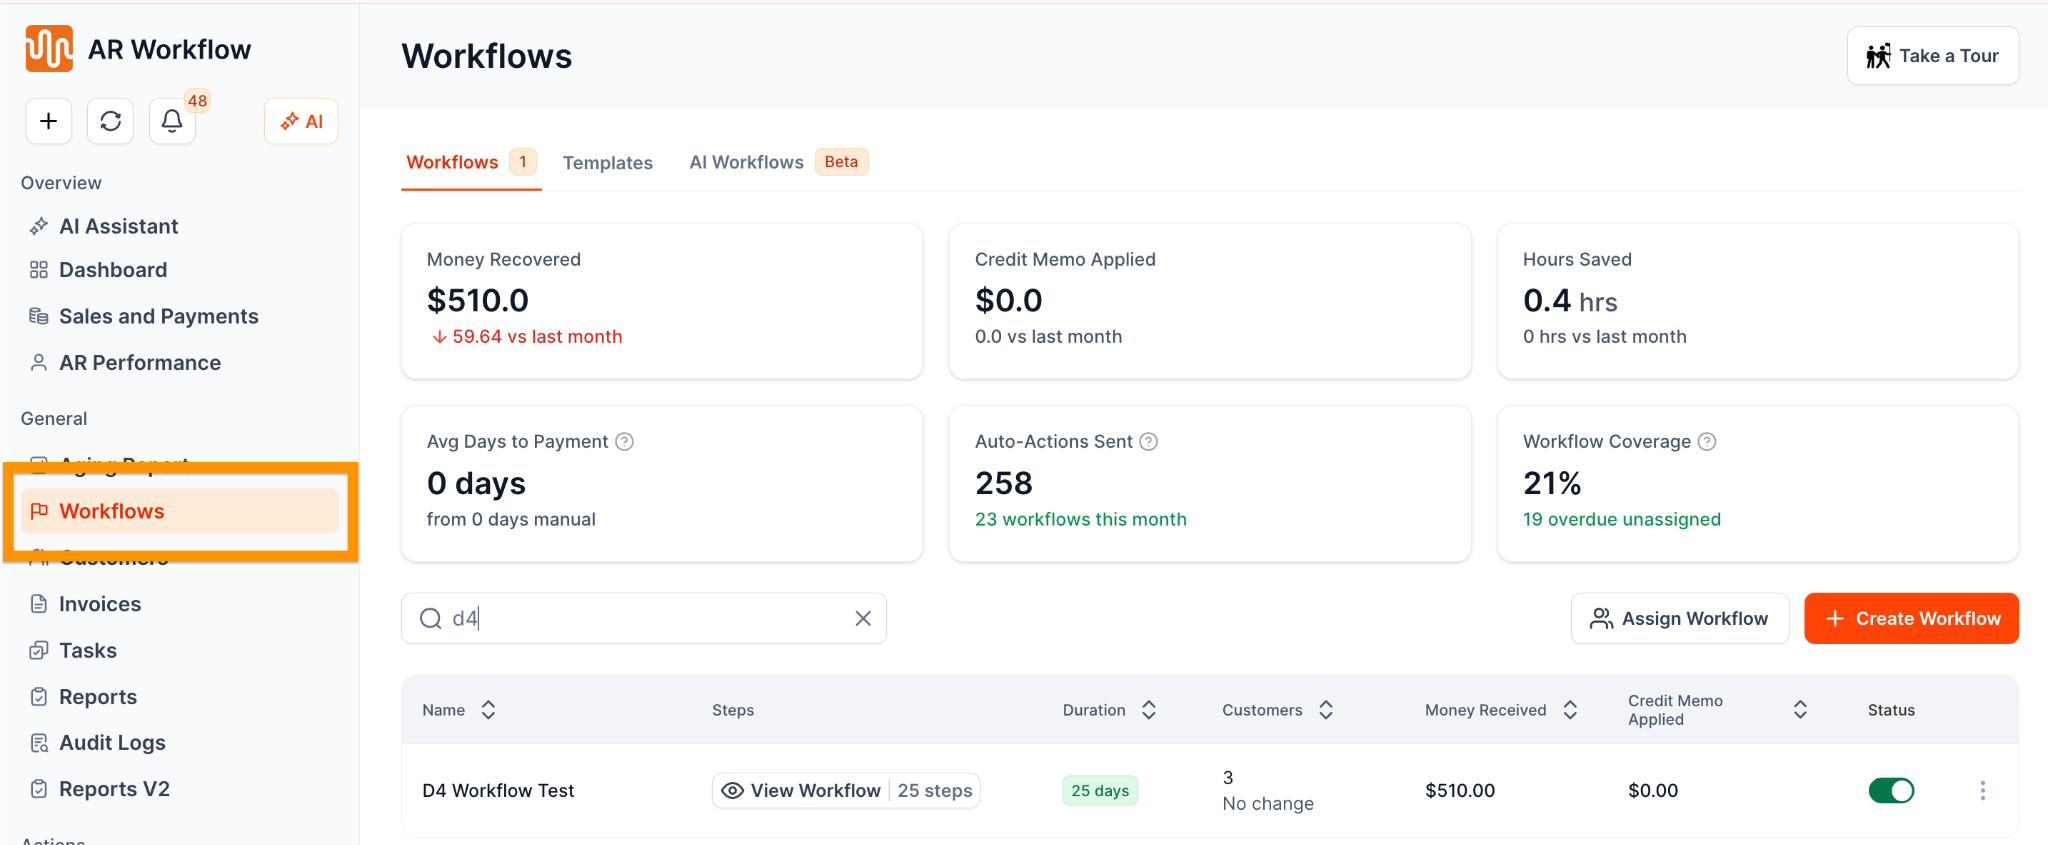
- Select the SMS or Email action you want to edit.
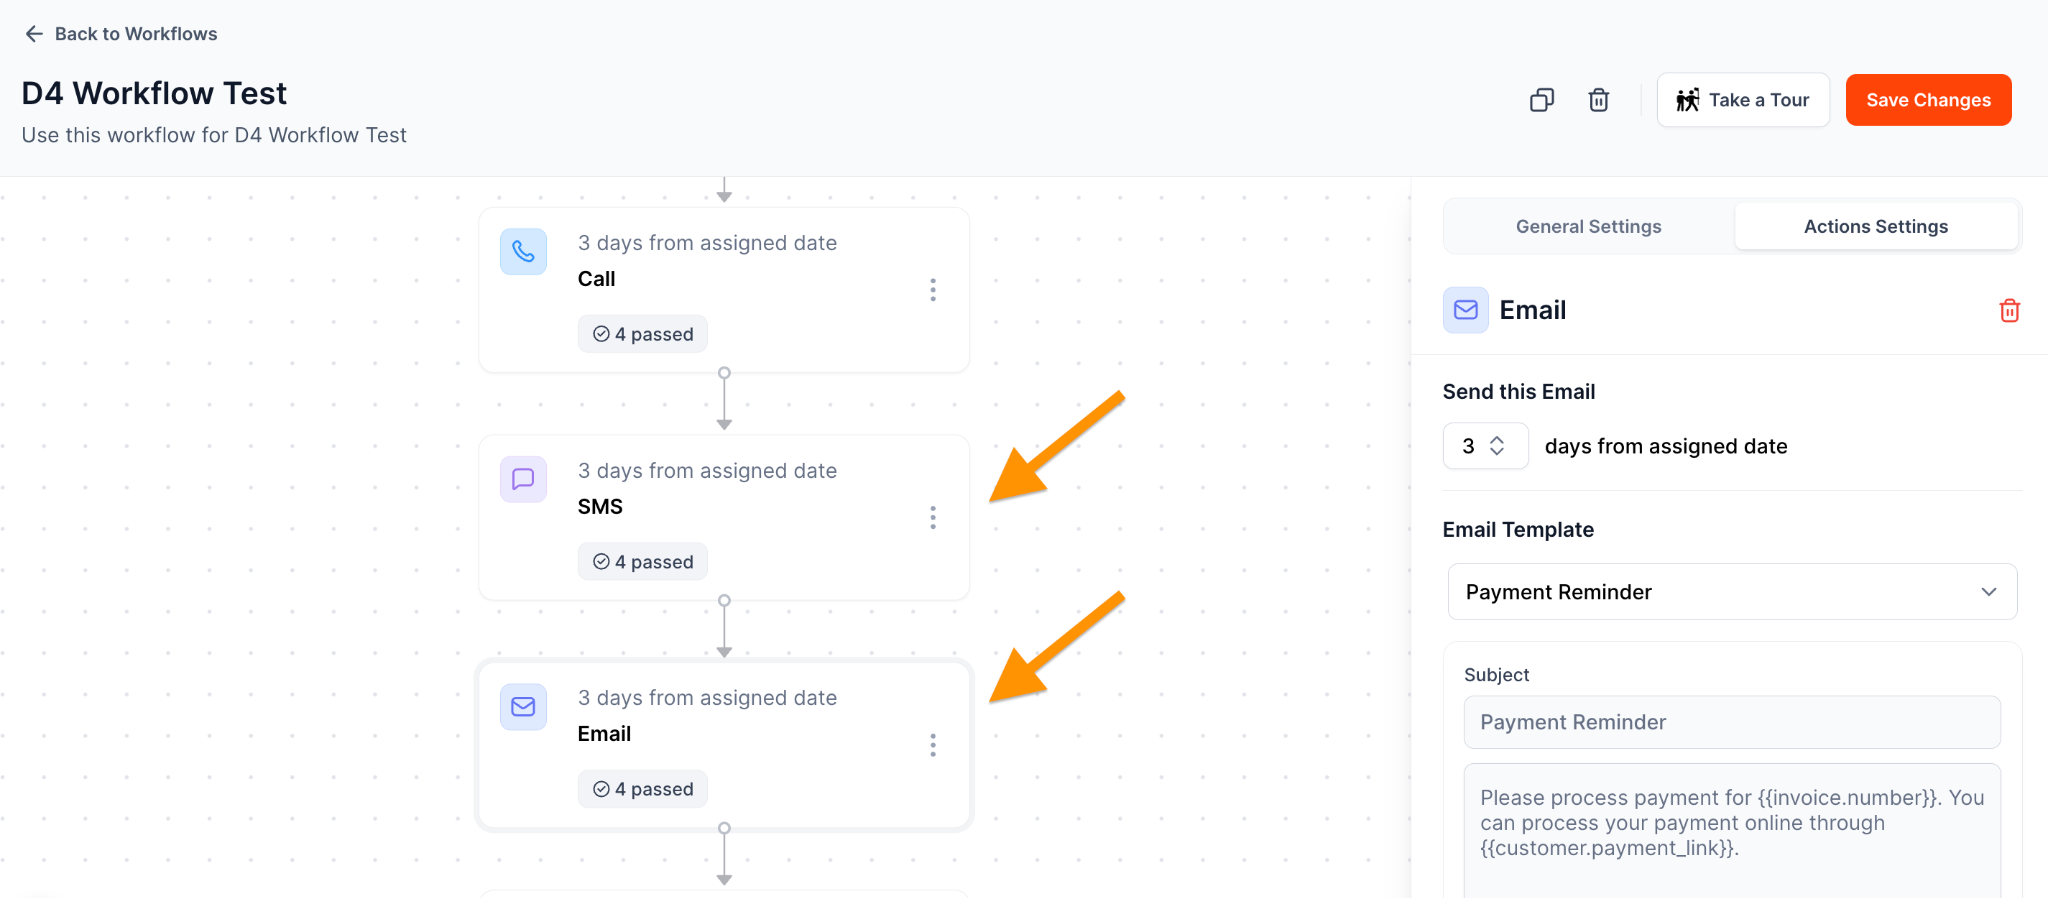
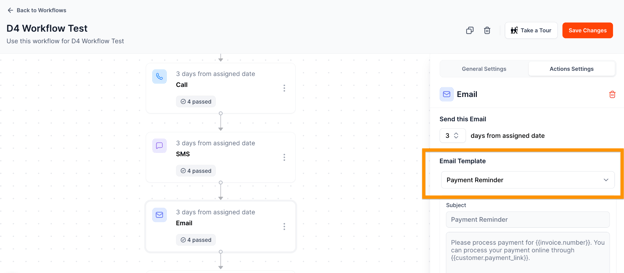
- In the right-hand sidebar, navigate to the Template section.
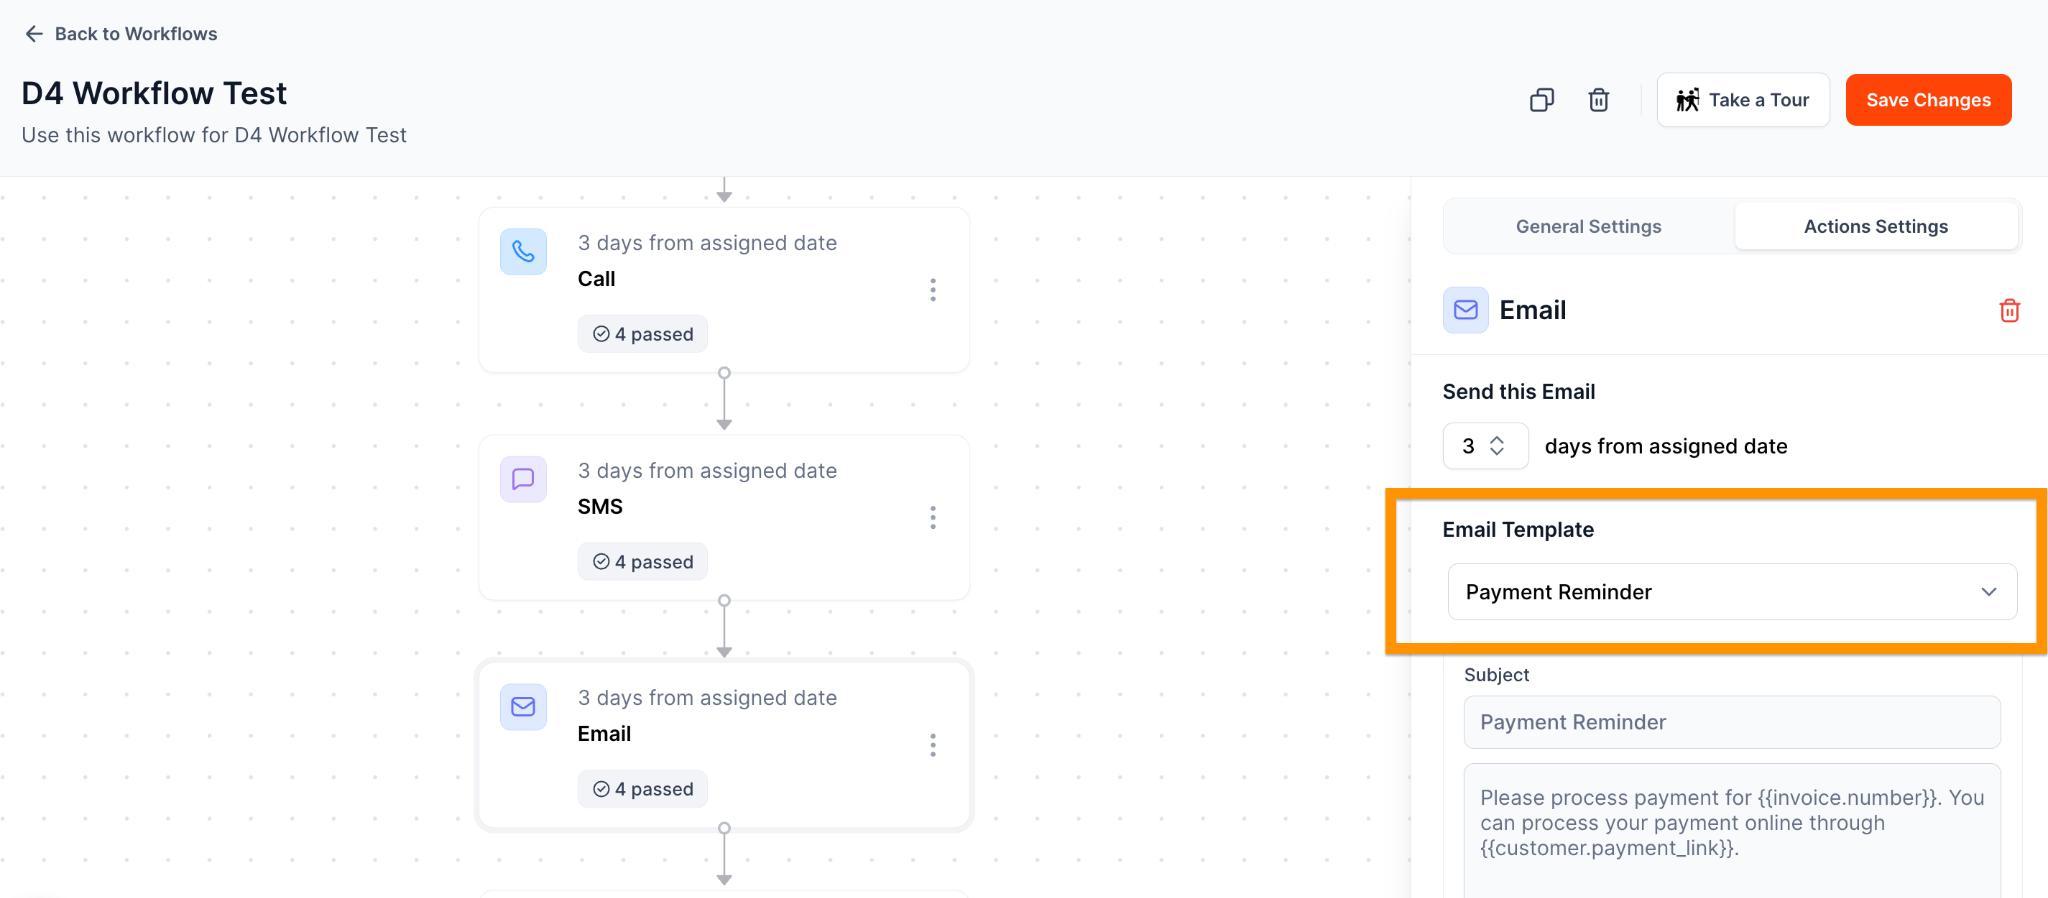
- Select the email or SMS template that contains the Customer Payment Link merge field.
- Click Save Changes in the upper-right corner to apply your changes.
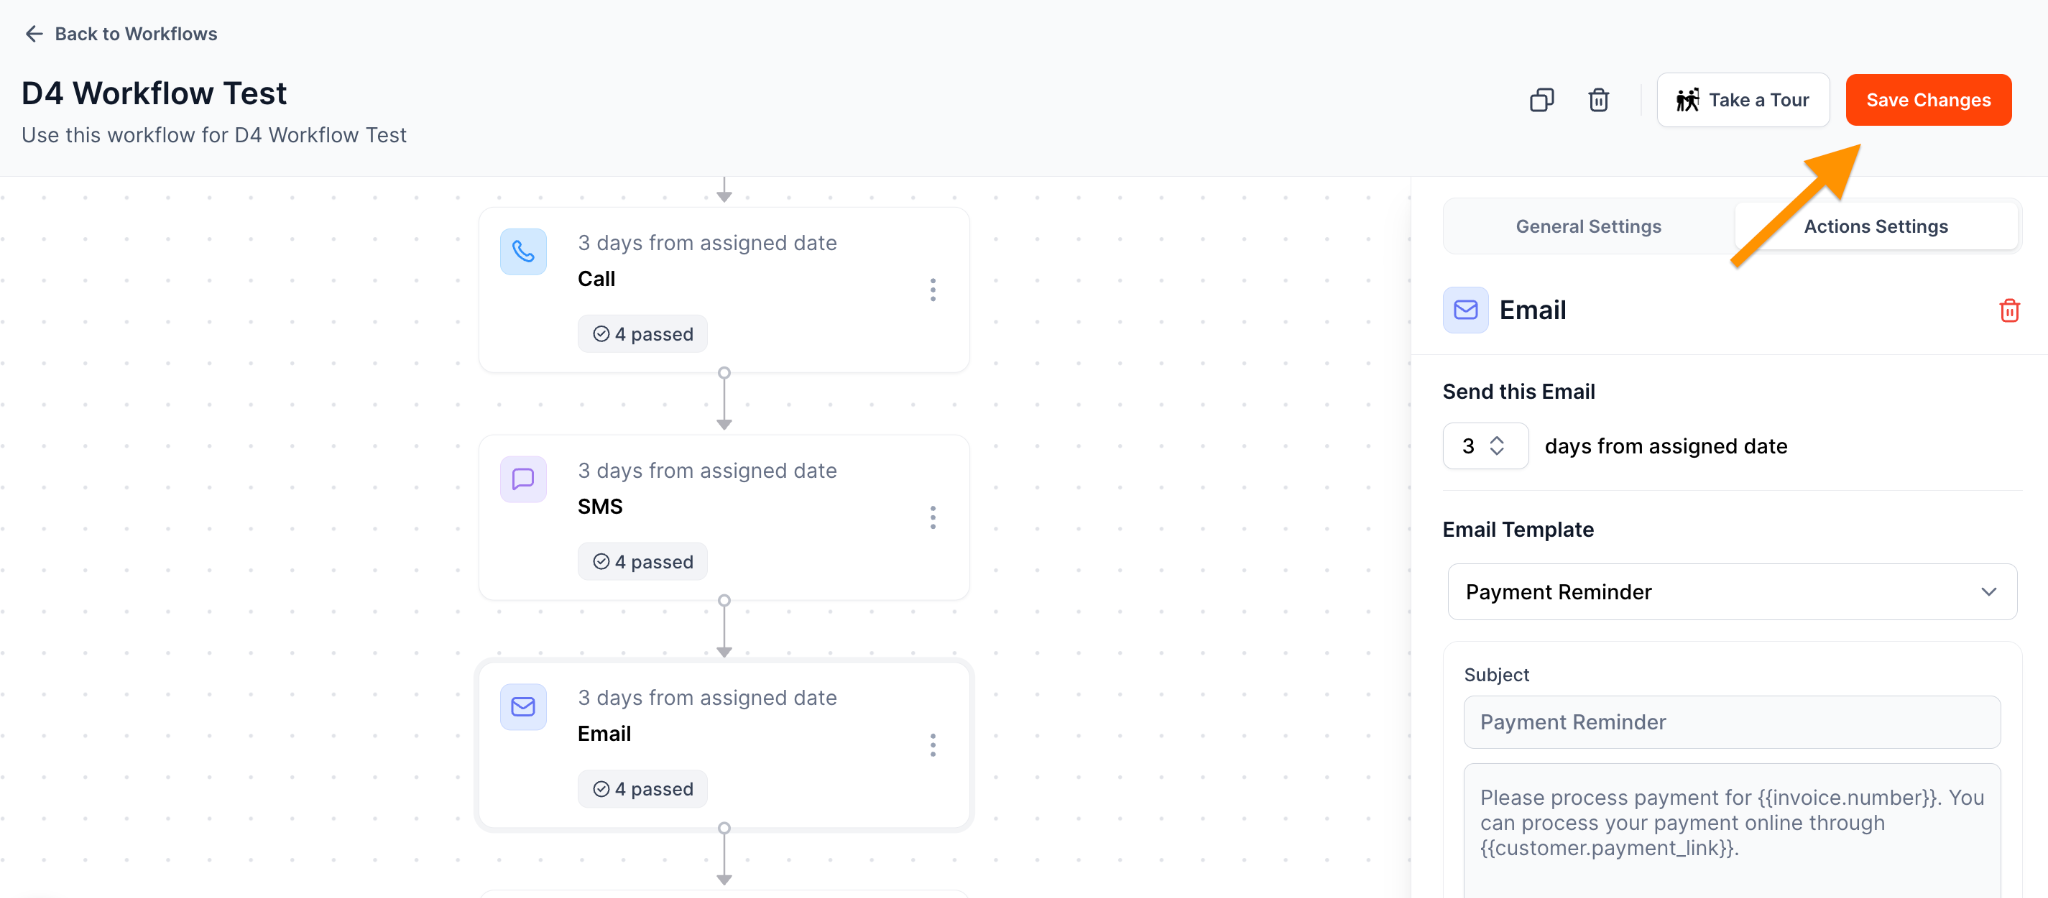
Once configured, the workflow can use the selected template to include the customer's payment link in the applicable email or SMS messages, including automated reminders.
Tip: Make sure the selected template includes the Customer Payment Link so the appropriate payment link can be included in the message.
3. VAPT Security: Public Payment Page Session Management
Overview
As part of the improved Vulnerability Assessment and Penetration Testing (VAPT) security, enhancements have been implemented to improve session management on the public payment page.
These address scenarios involving multiple payment links opened in the same browser and payment sessions that remain open beyond the permitted duration.
A four-hour session timeout has been introduced, along with additional handling for concurrent payment sessions. These improvements help manage payment sessions more consistently and provide clear instructions to customers when they need to initiate a new payment session.
2.1. Concurrent Payment Session Handling
The public payment page now handles payment sessions based on the customer.
If a customer opens one payment link and then opens another payment link in the same browser, the latest link takes precedence. The customer can proceed with the payment using the most recently opened link.
However, if the customer returns to the previously opened payment link and attempts to make a payment, the system will display the following error message:
“We couldn’t find your payment session. Please initiate the payment again using the payment link.”
This behavior helps prevent conflicts when multiple payment links are accessed in the same browser and directs customers to restart the payment process using the appropriate link.
2.2. Payment Session Timeout
A four-hour session timeout has been implemented on the public payment page.
If a customer opens a payment link but attempts to complete the payment after four hours, the session will have expired. The system will display the following error message:
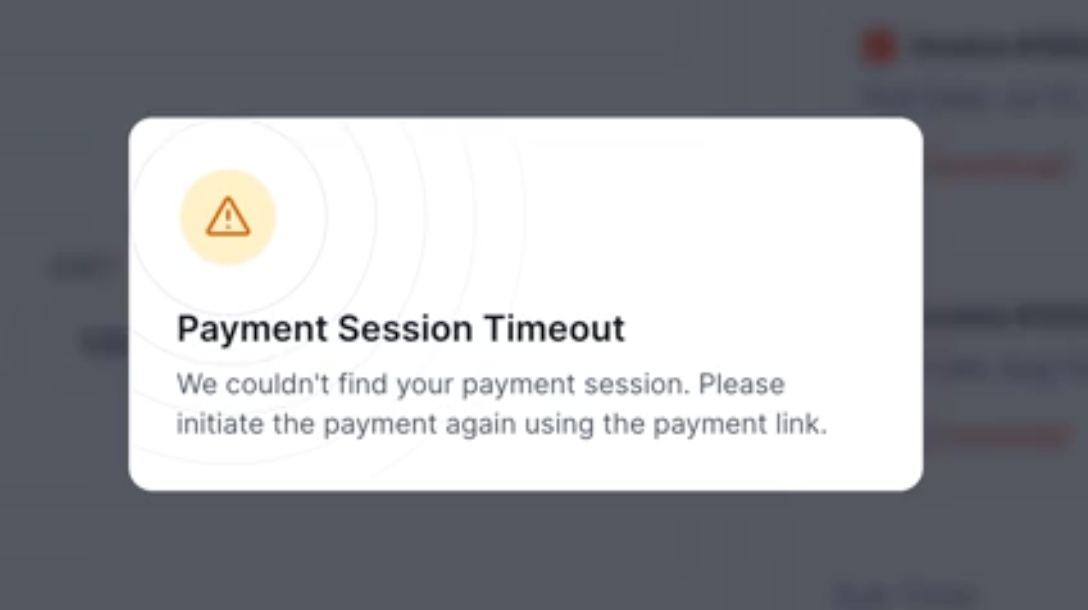
This ensures that expired sessions are handled appropriately and informs customers when they need to initiate a new payment session.
2.3. How Customers Can Retry Their Payment
If a customer encounters either of the error messages described above, they can retry their payment by following these steps:
- Return to the original payment notification received through email or SMS.
- Click the payment link again to initiate a new payment session.
- Proceed with the payment using the newly initiated session.
Customers can use their original payment notification to access the payment link again rather than requesting a new link.